
Appearance
Create iOS Certificate
This section introduces how to create iOS certificates to help you complete the launch configuration for the OEM App.
Prerequisites
- You need to register and enroll in Apple Developer Program to launch your App on the App Store.
- Prepare a computer with macOS.
Create App ID
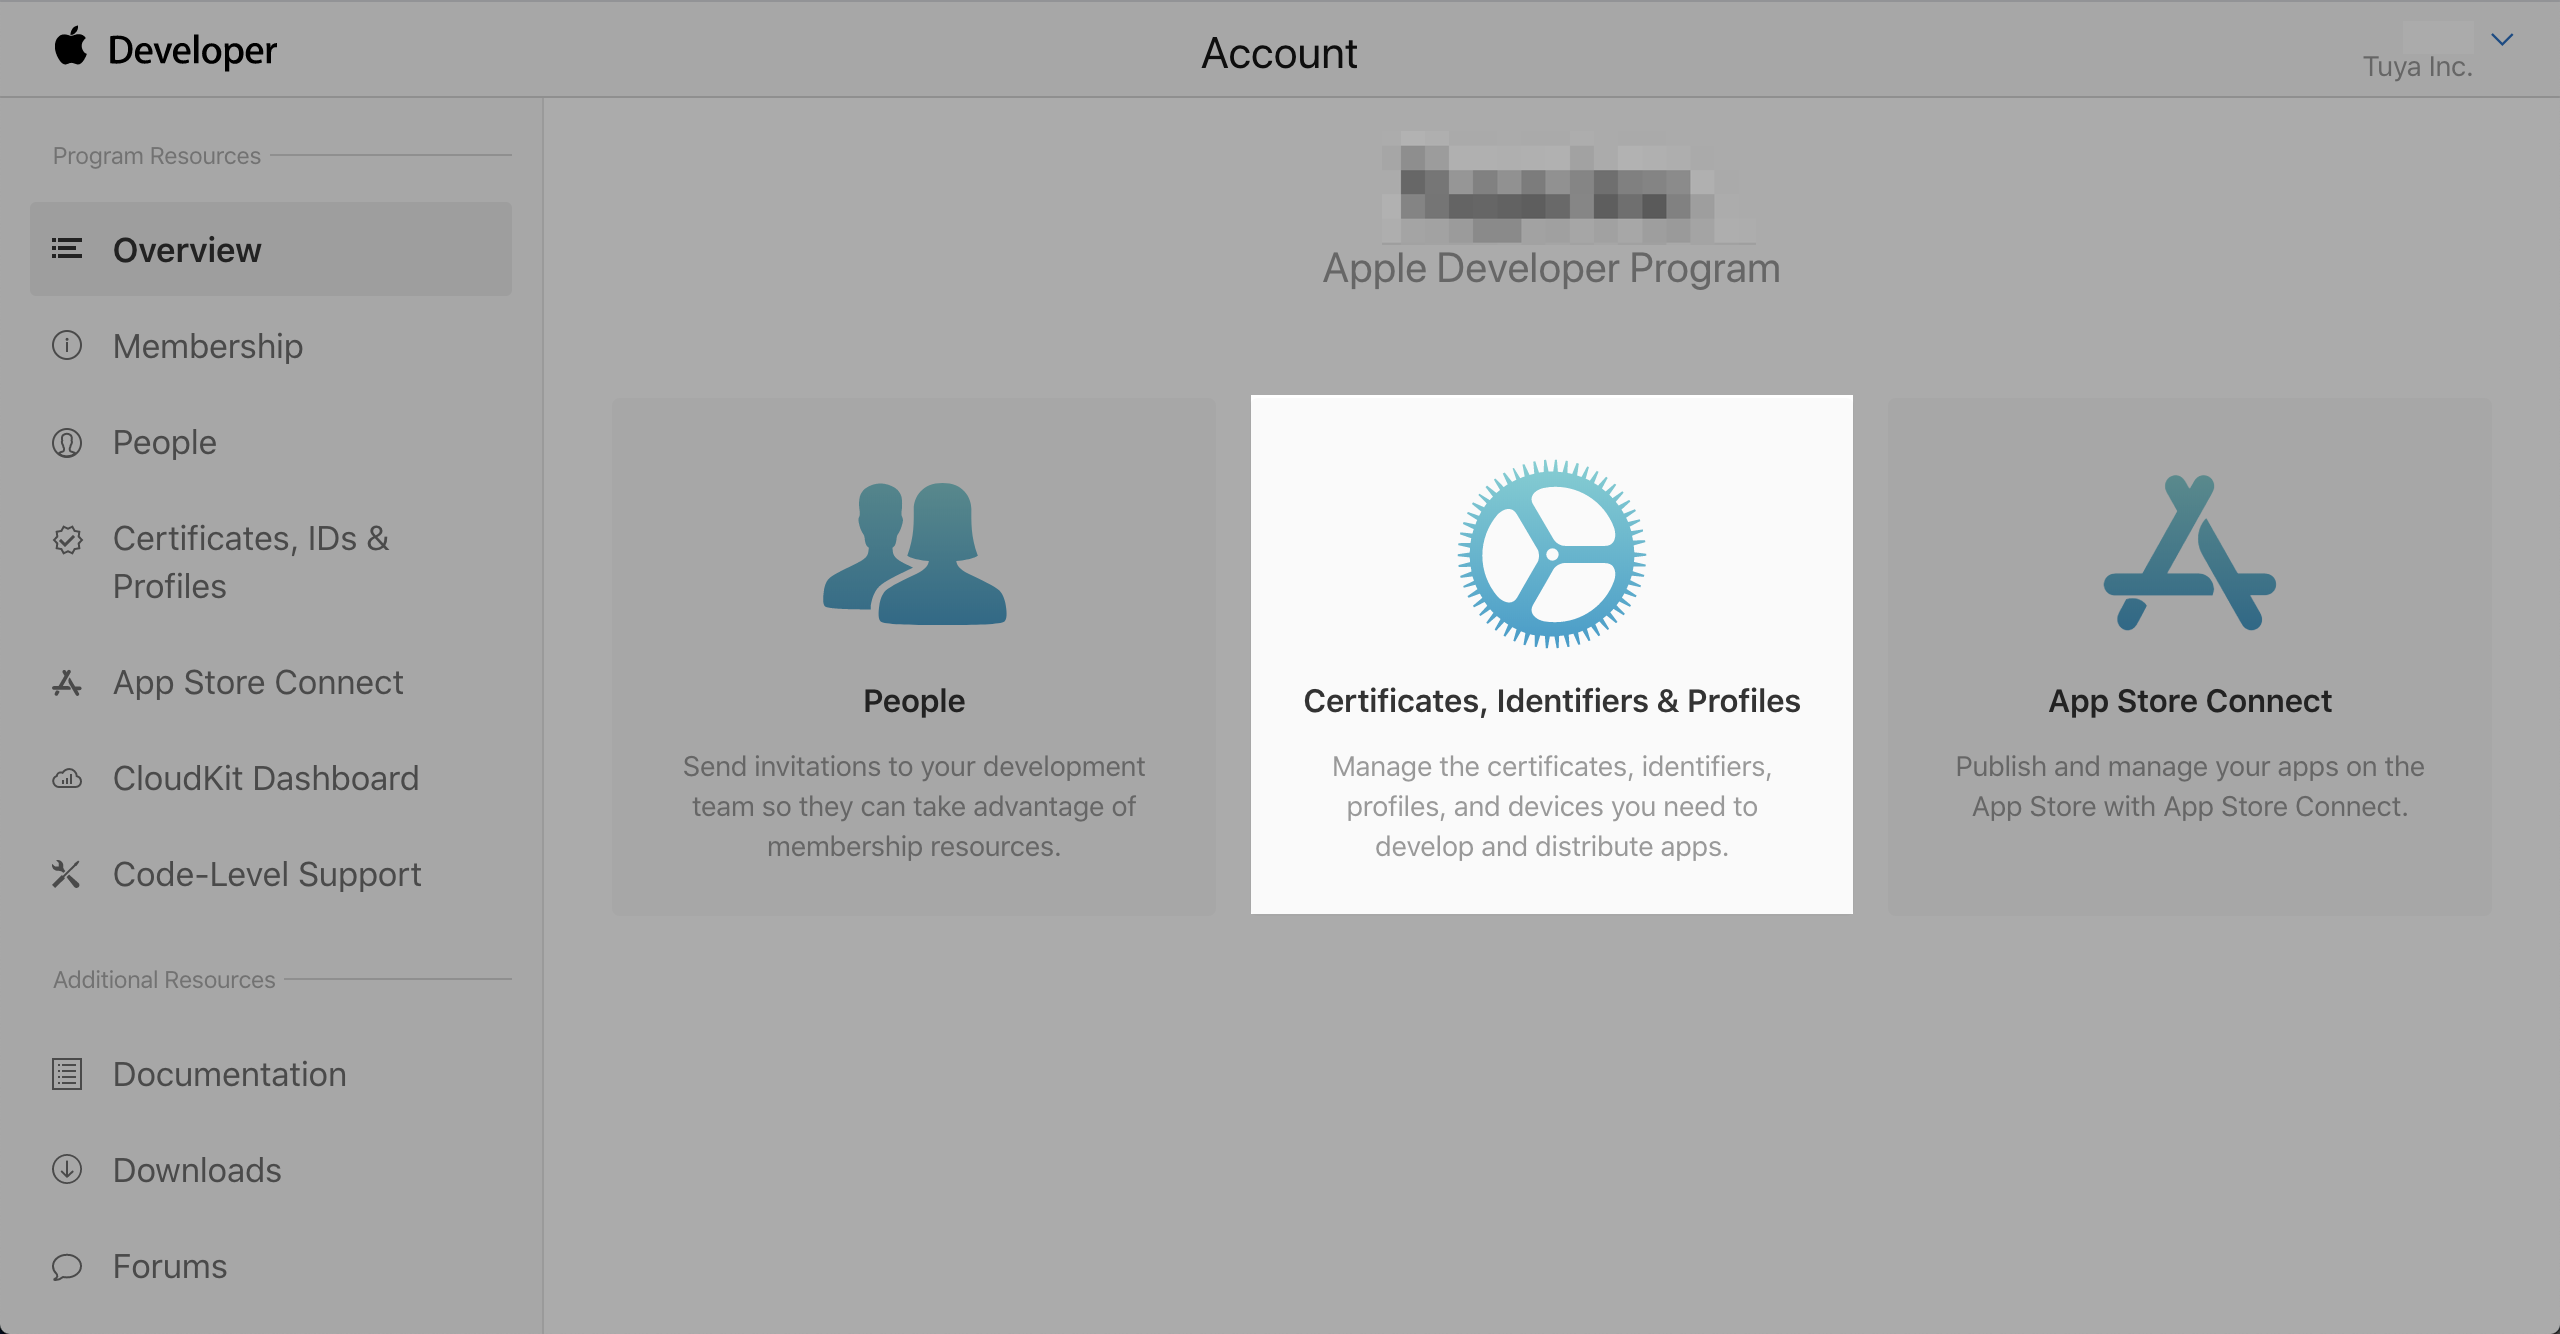
- Log in to Apple Developer and select "Certificates, Identifiers & Profiles".
- Select "Identifiers" and click "+".

- Select "App IDs" and click "Continue".

- Enter a description in the "Description" field, such as the English name of your App. Select "Explicit" in the "Bundle ID" field and enter your bundle ID.
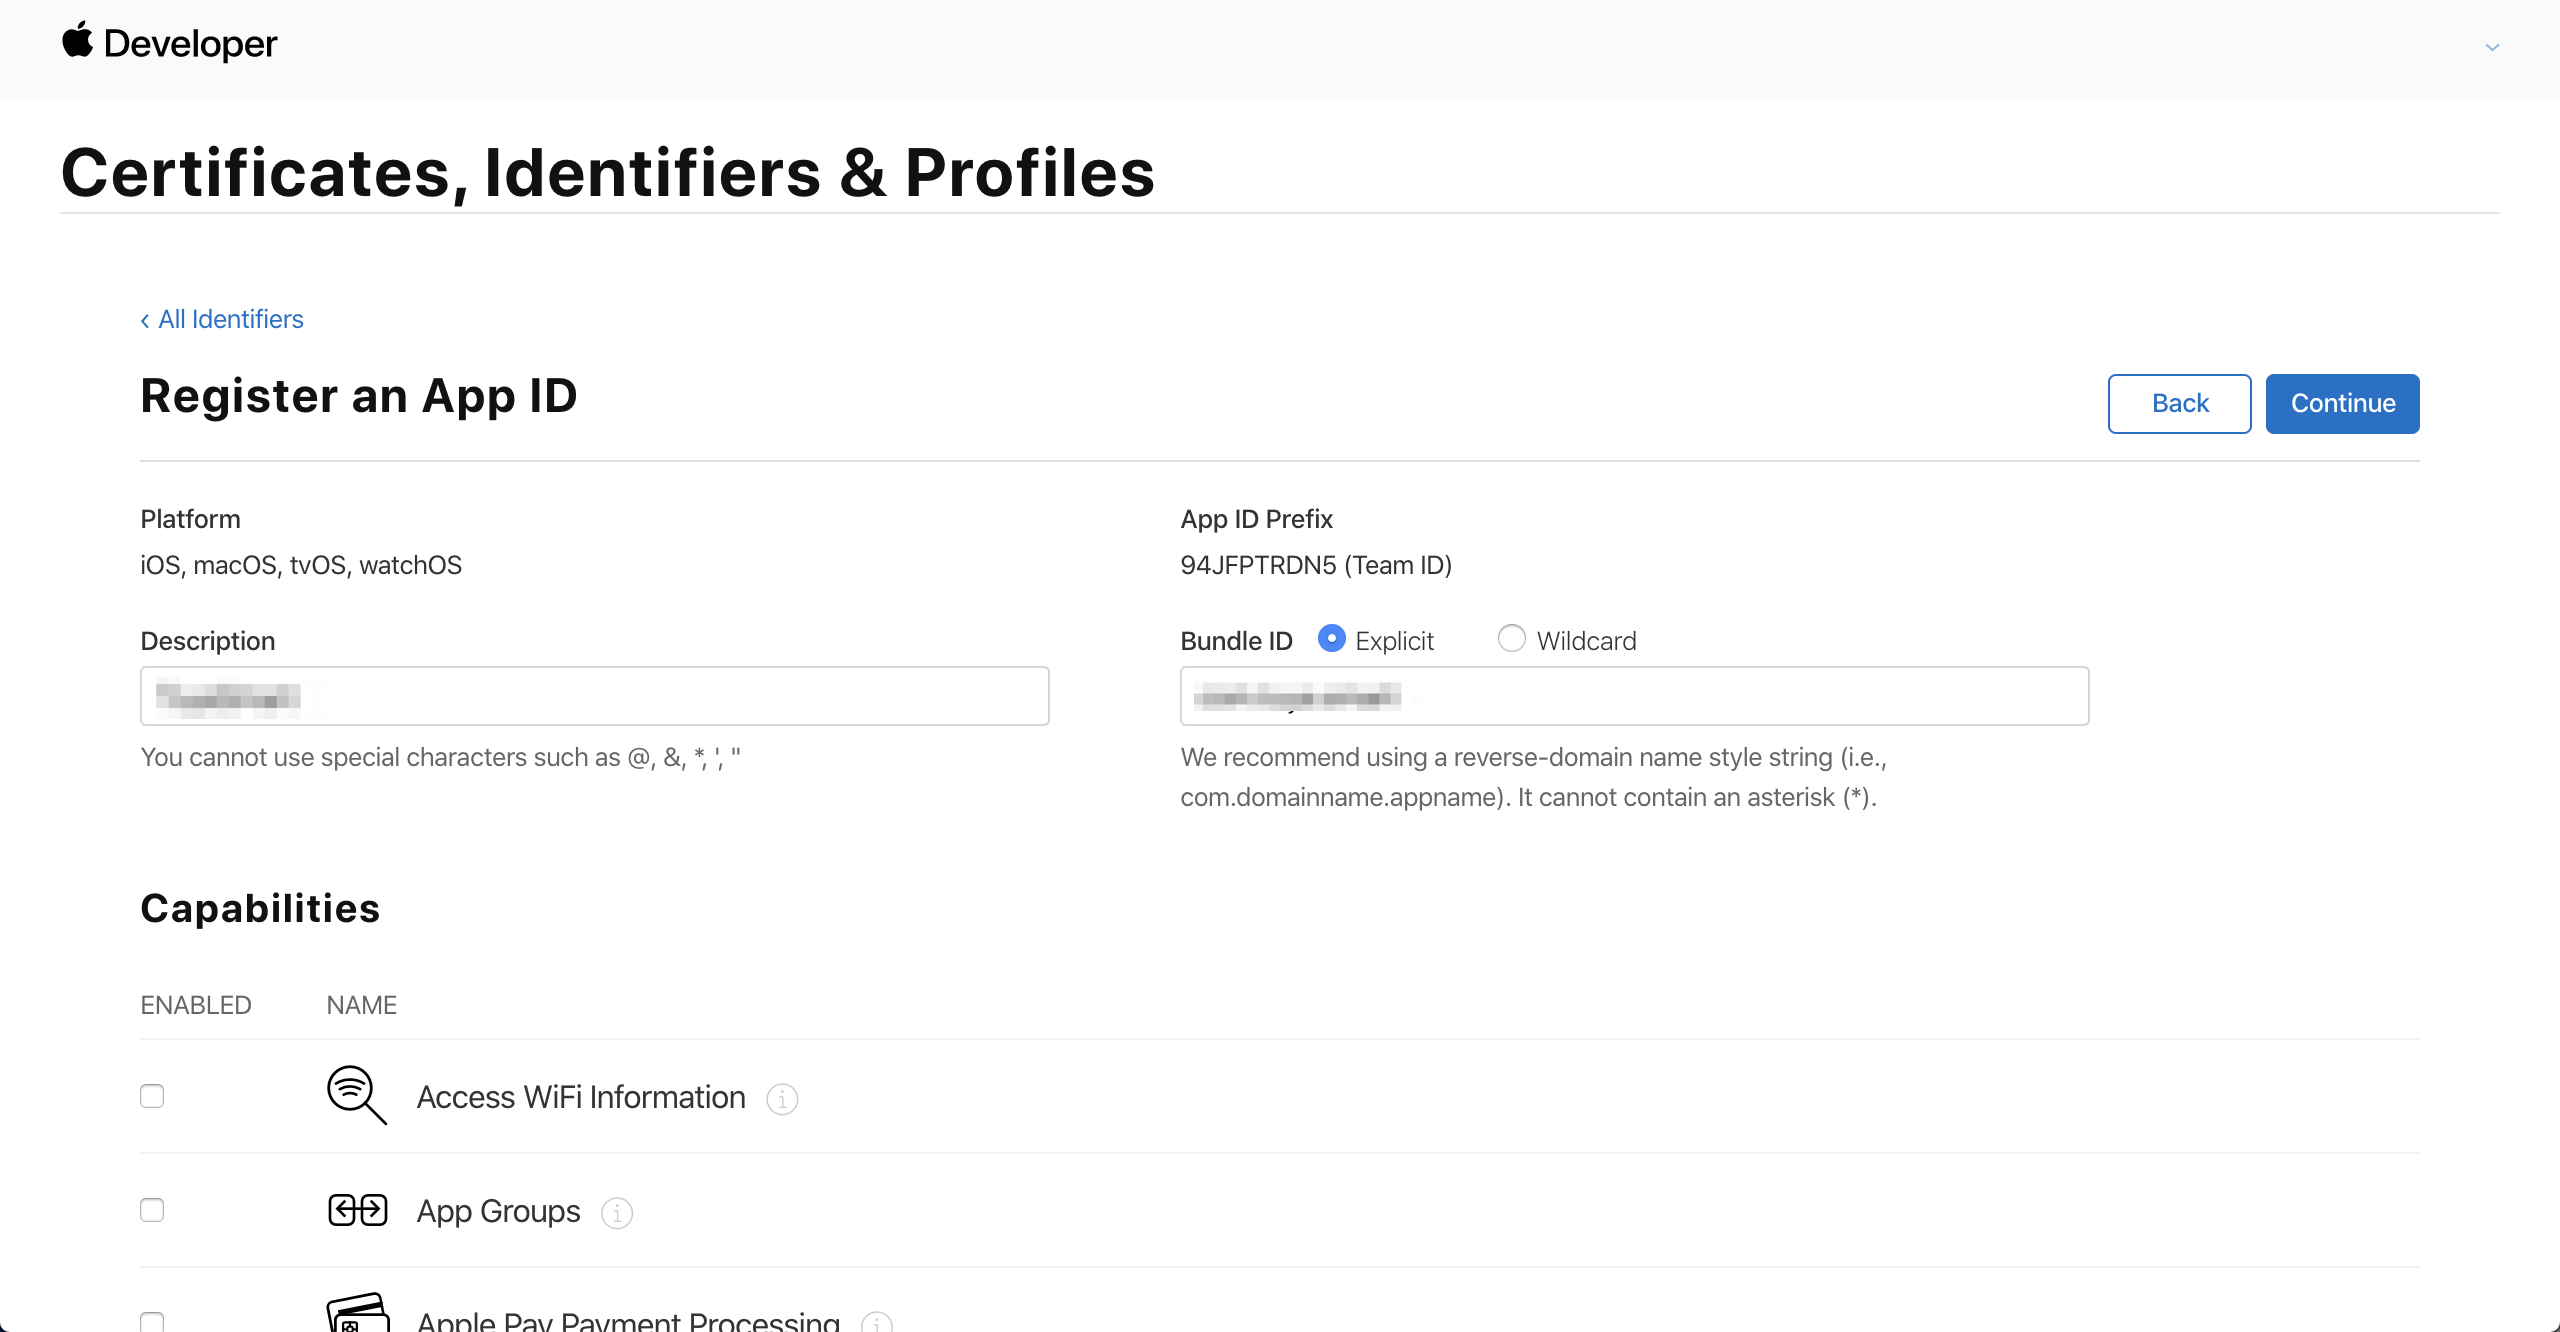
Check the following options in the "Capabilities" list:
Access WiFi Information
Associated Domains
Push Notifications
Sign In with Apple、Enable as a primary App ID (optional)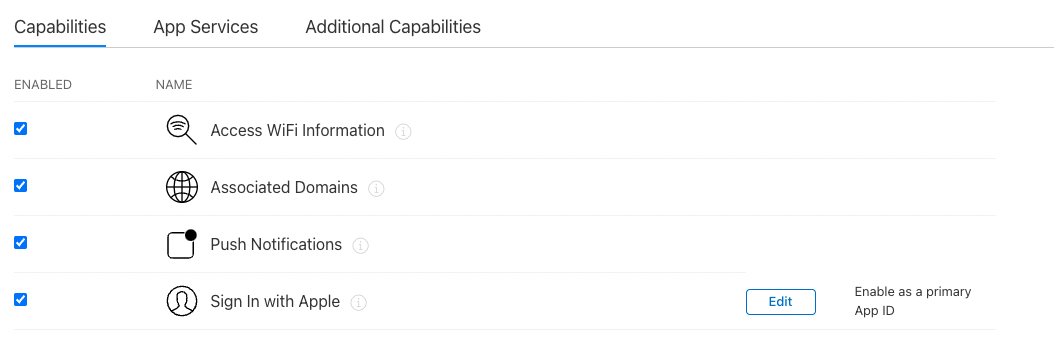
Note:
If your app includes value-added services, you need to enable additional permissions.- Click "Continue" and then "Register" after confirming that the information is correct. If the system prompts "An App ID with Identifier 'com.xxx.xxx' is not available. Please enter a different string.", it means that the bundle ID is occupied. Click "Back" to return to the previous step and change the bundle ID.

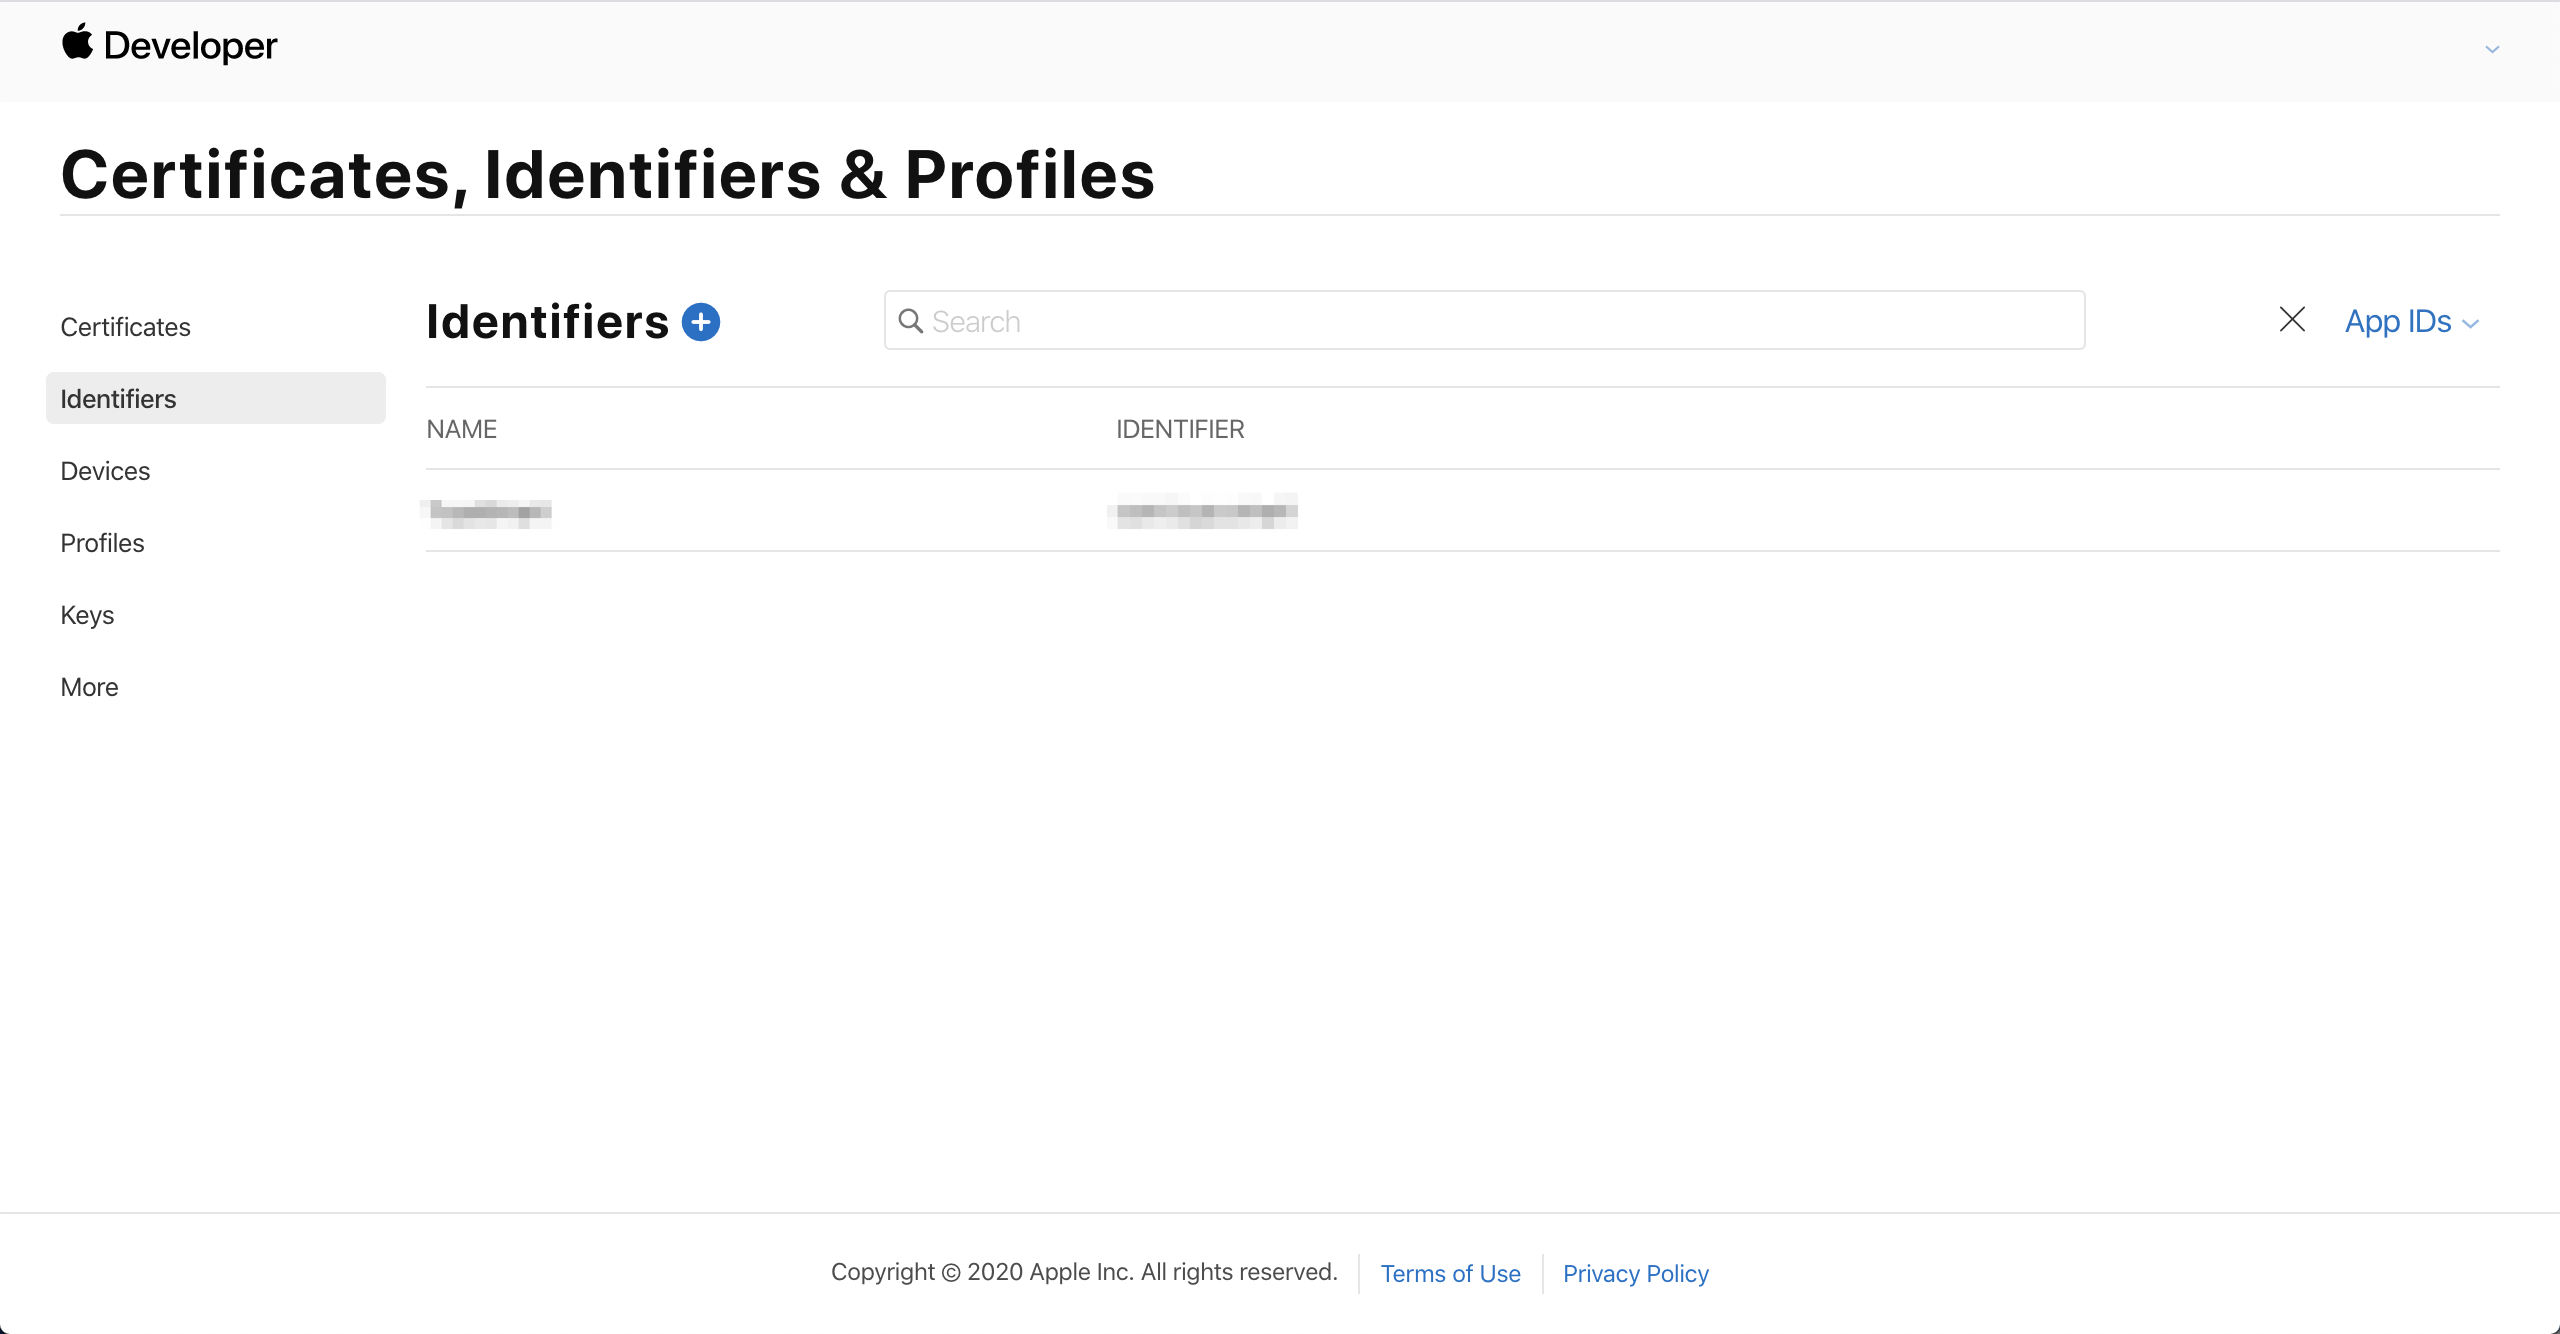
- If there are no error messages, the App ID will be displayed in the list, indicating that the App ID has been created successfully.
Create CSR File (.certSigningRequest Format)
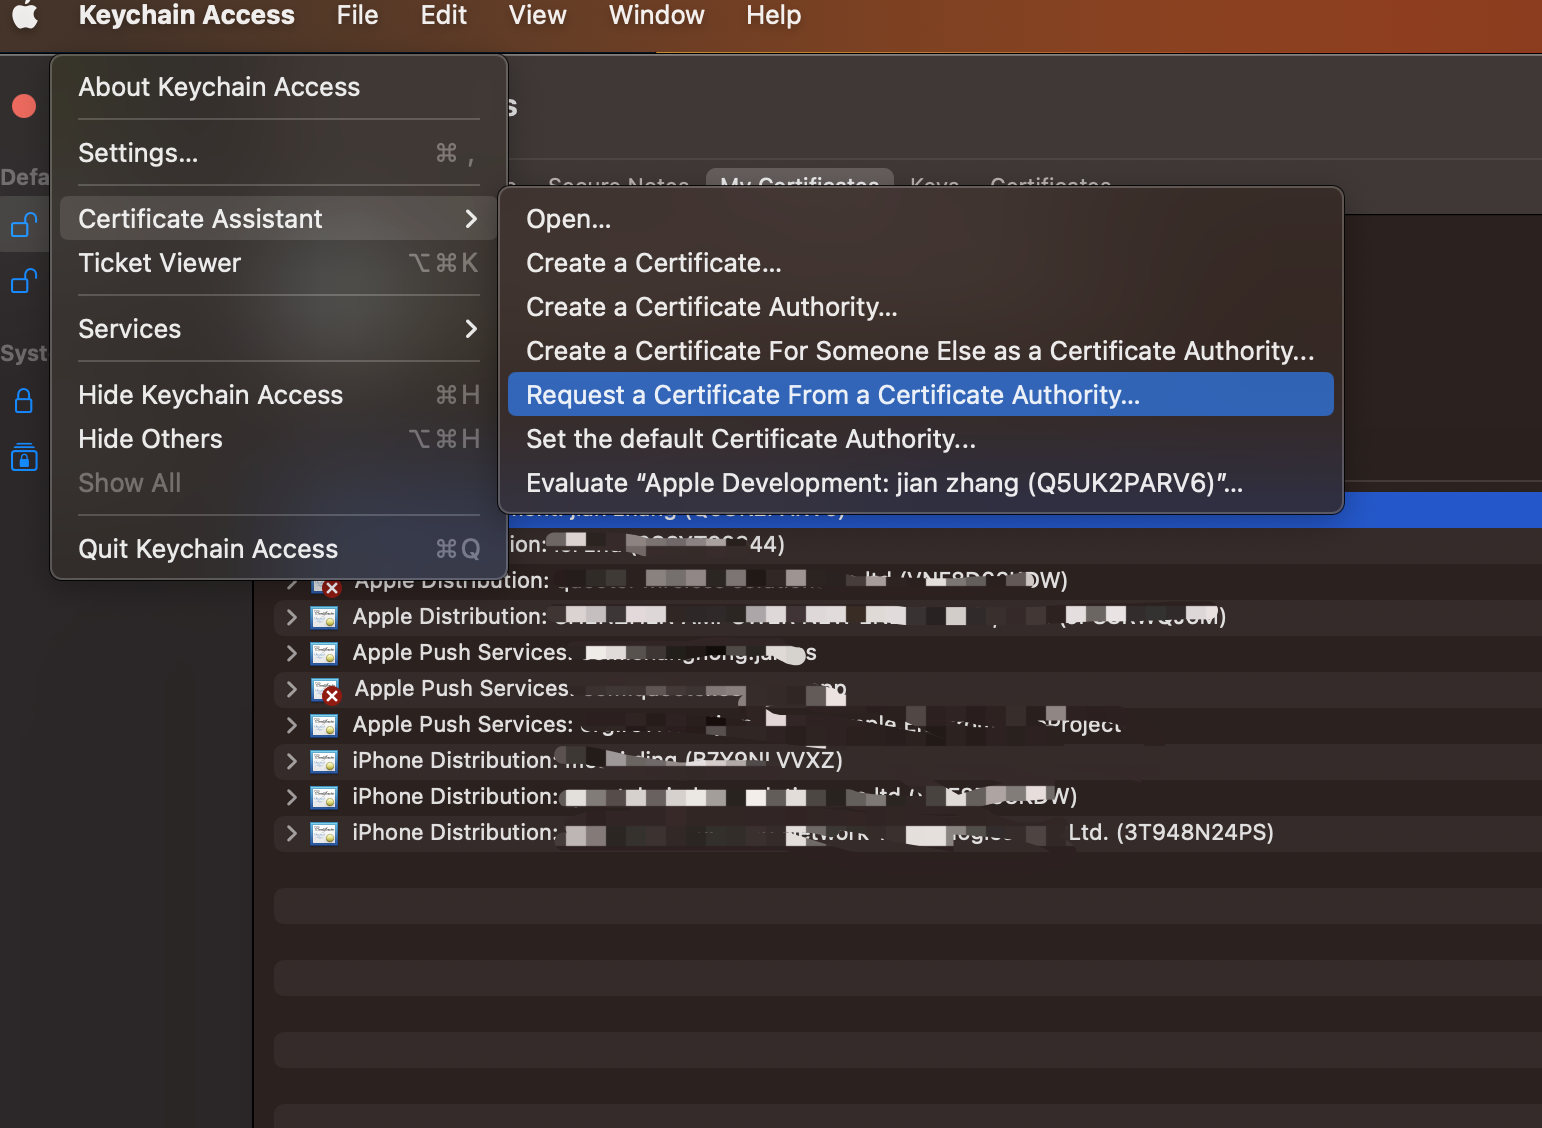
- Open "Keychain Access" on macOS, and click "Keychain Access" > "Certificate Assistant" > "Request a Certificate from a Certificate Authority".
- Fill in your email address in the "User Email Address" field, your name in the "Common Name" field, select "Save to disk", and click "Continue".
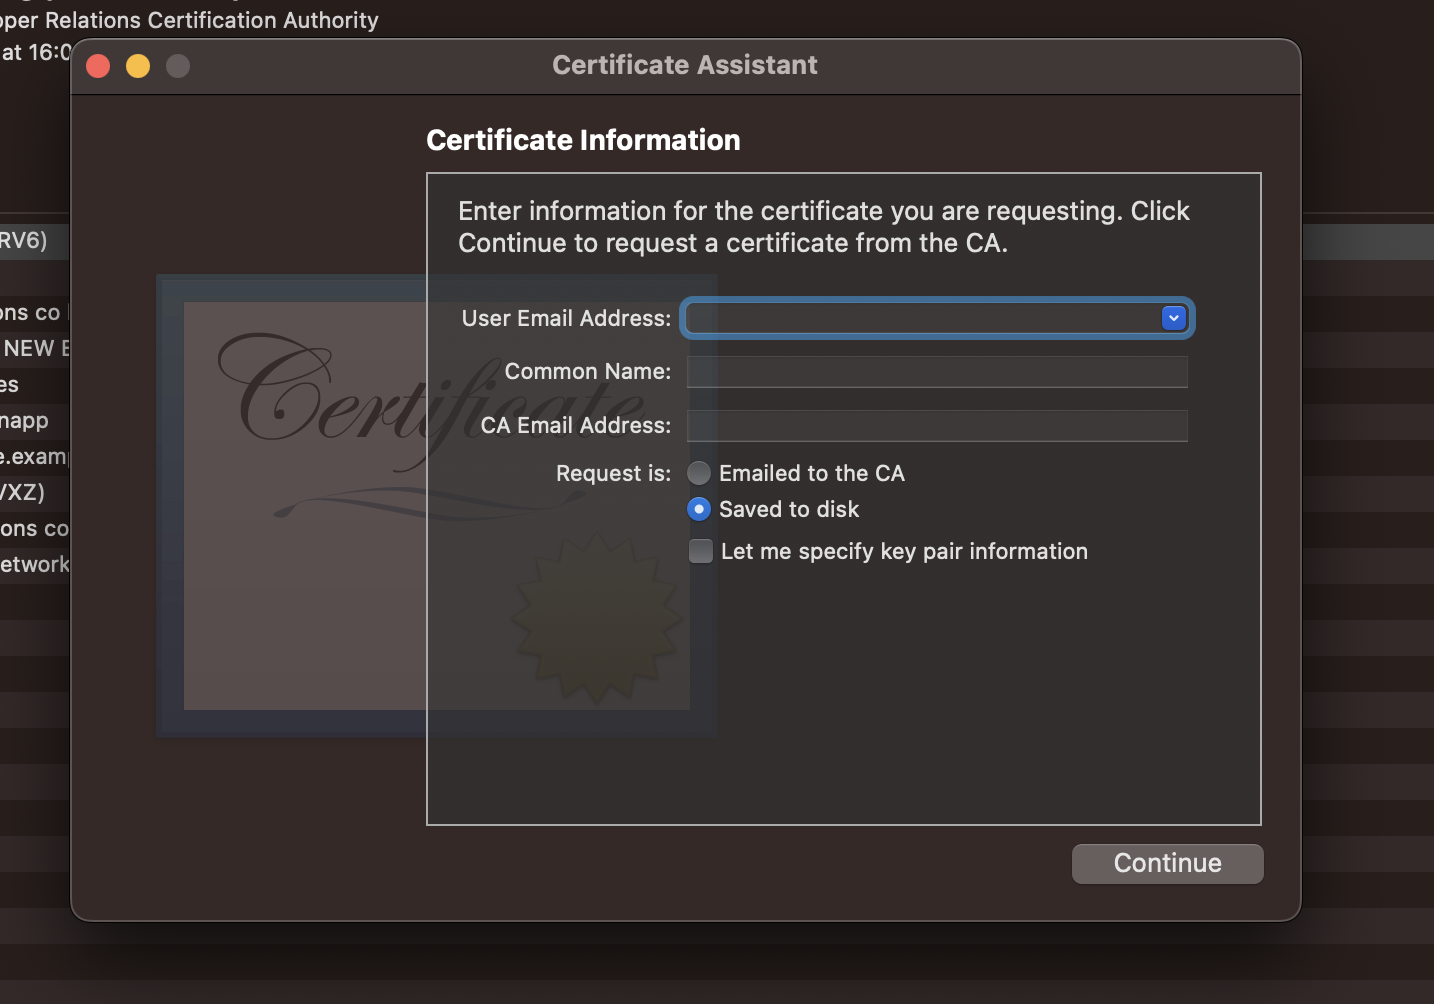
- Save CertificateSigningRequest.certSigningRequest file to your local disk to complete the creation of the CSR file.
Create App Distribution Certificate (.p12 Format)
Note: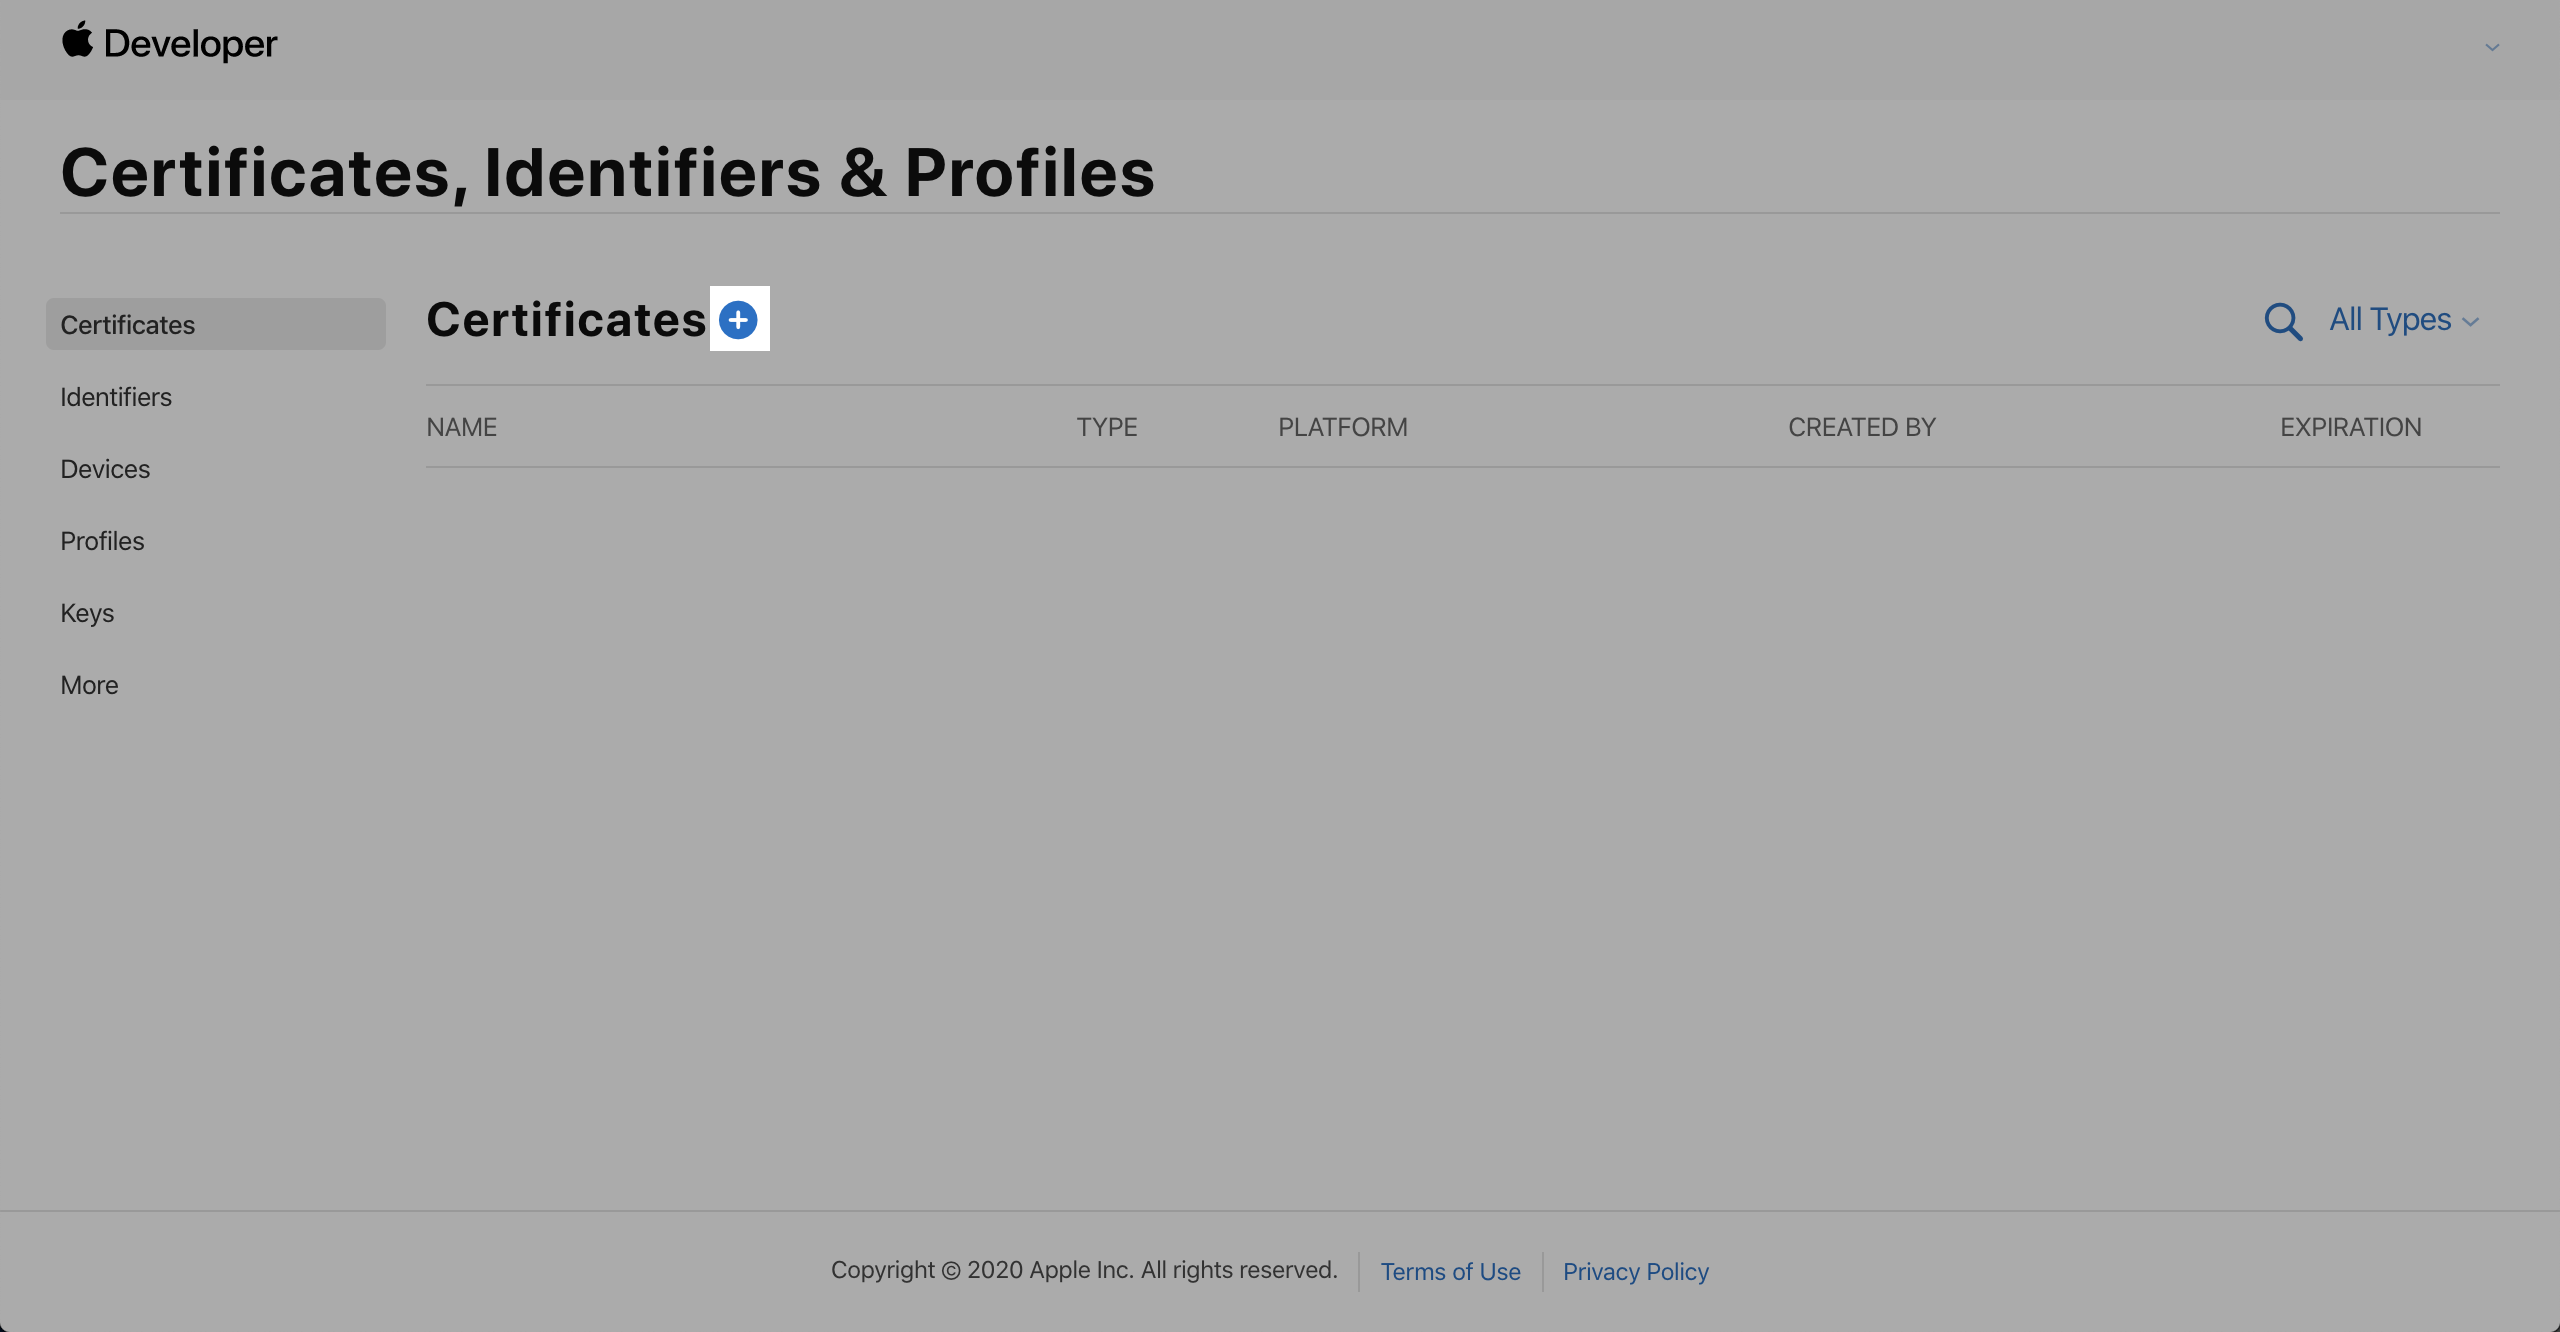
If you have multiple apps under your account, you do not need to create multiple app distribution certificates, but use the same one. Creating multiple certificates will cause unnecessary trouble.- Open the "Certificates, Identifiers & Profiles" page, select "Certificates" and click "+".
- Select "iOS Distribution (App Store and Ad Hoc)" and click "Continue".
Note:
If you cannot select this option and receive a pop-up that the certificate limit has been exceeded, return to the previous page and delete redundant certificates. Deleting certificates will not affect the normal use of launched apps. Certificates are only used during the app build and upload stages.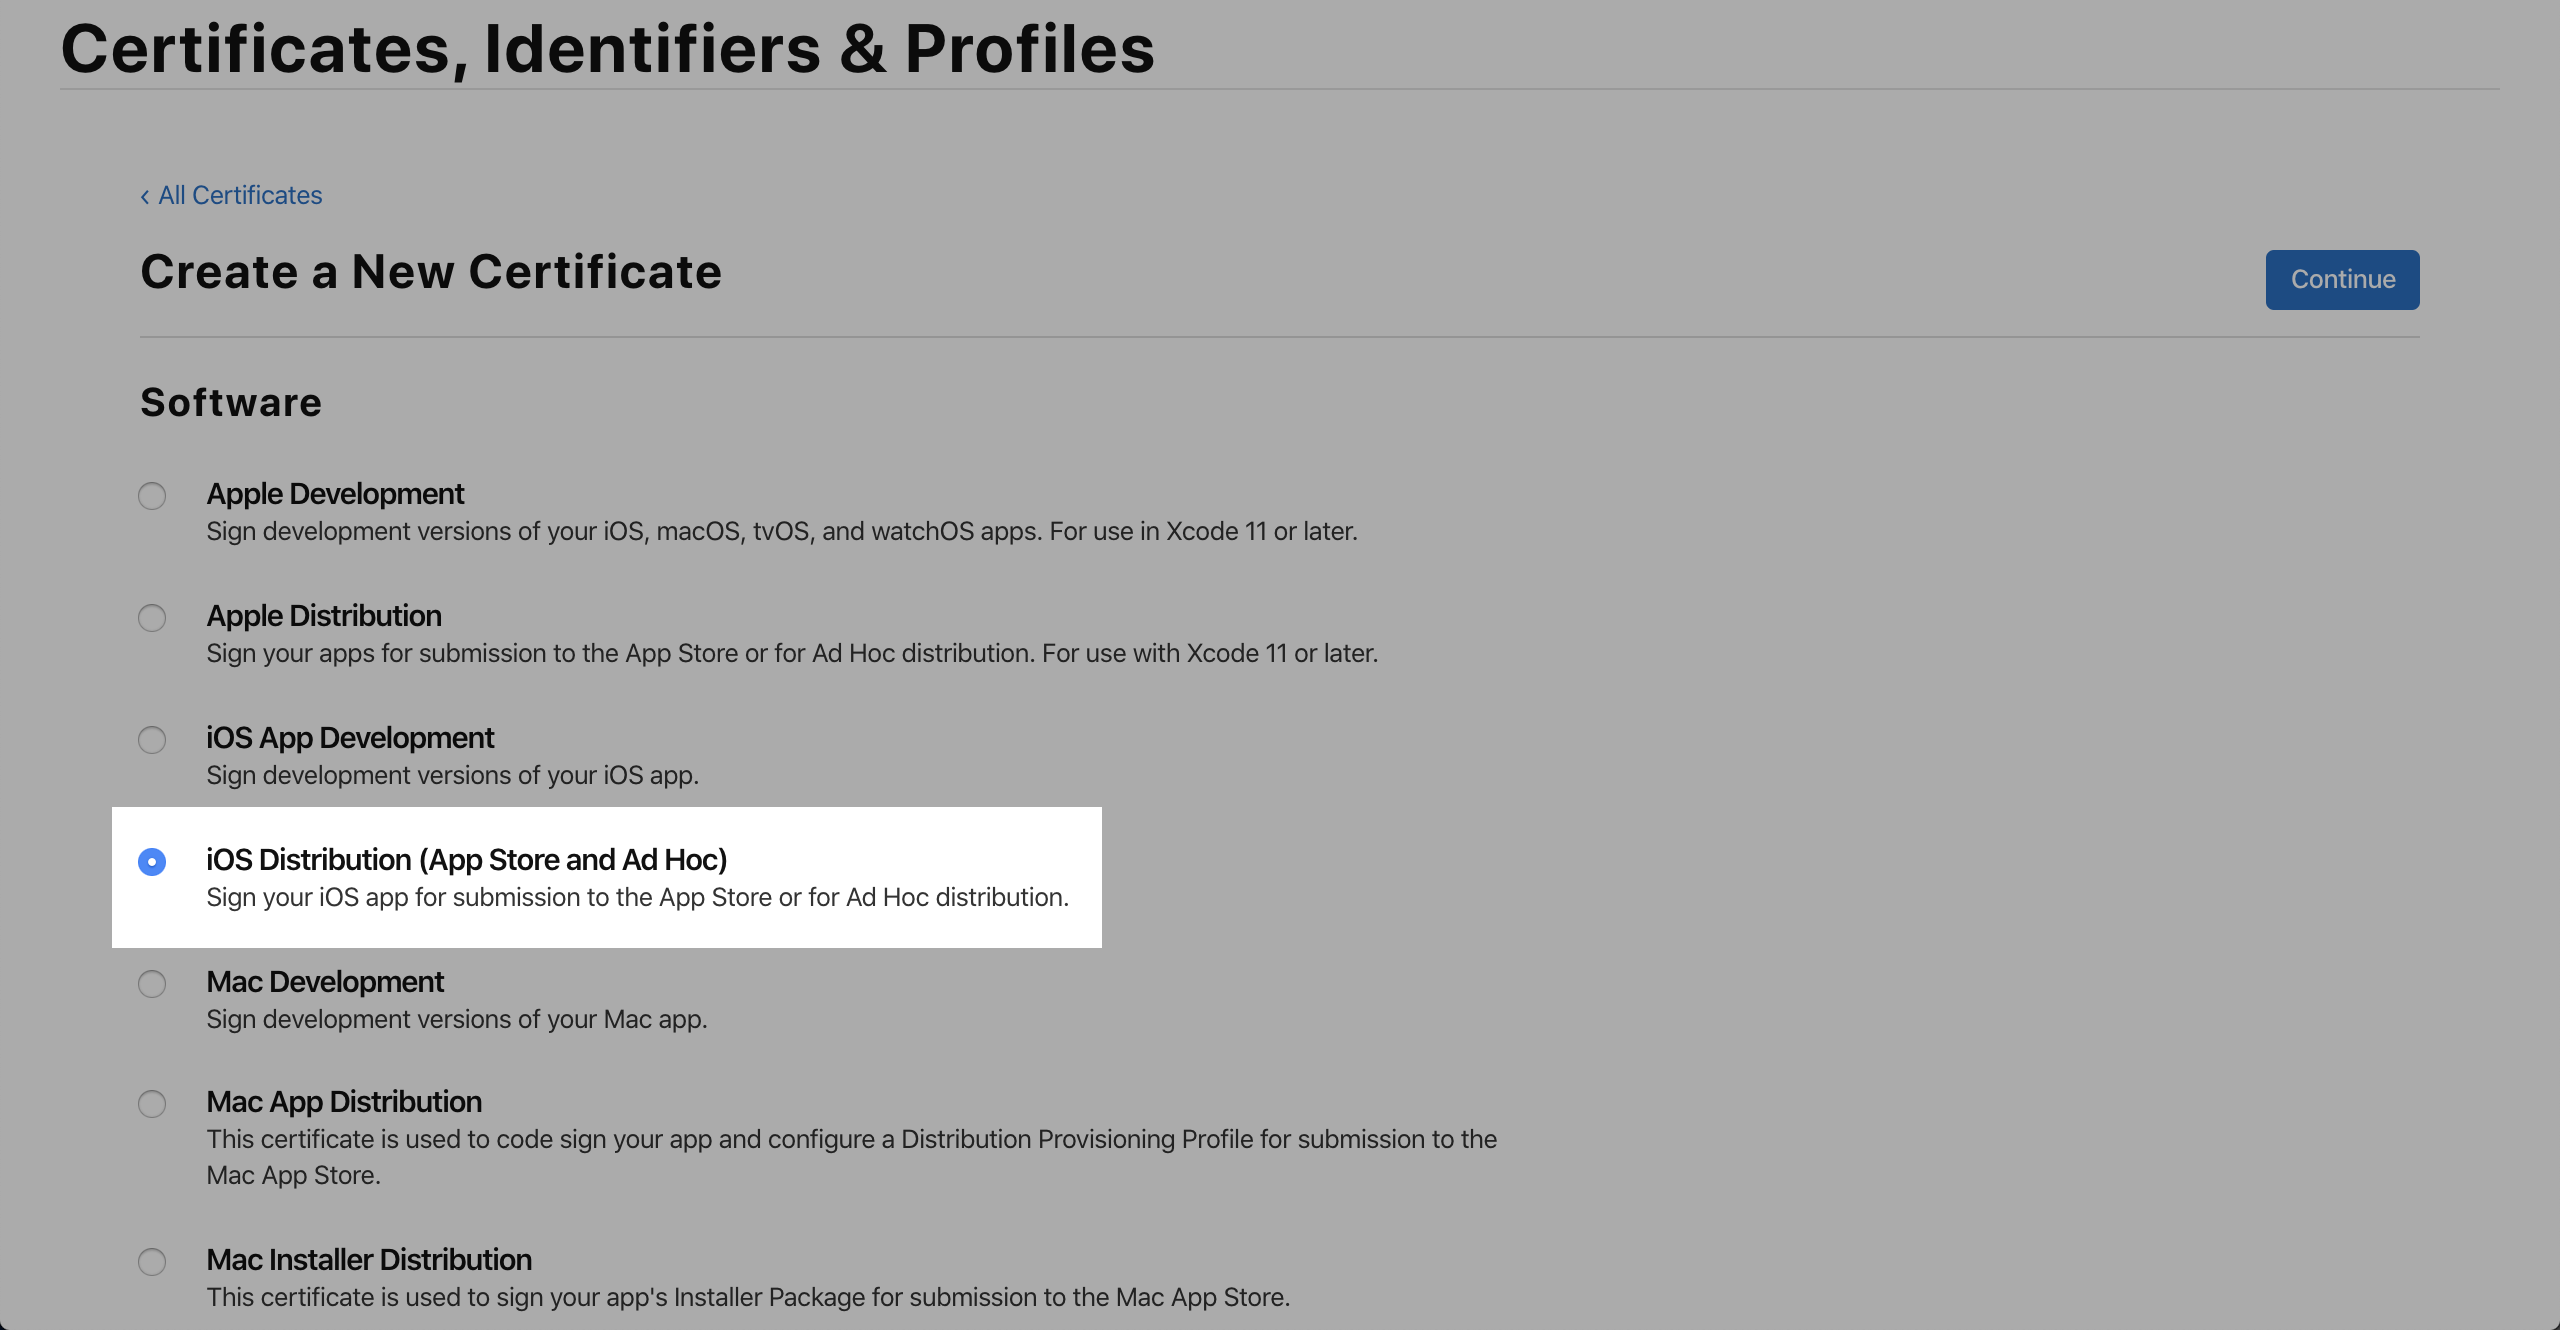
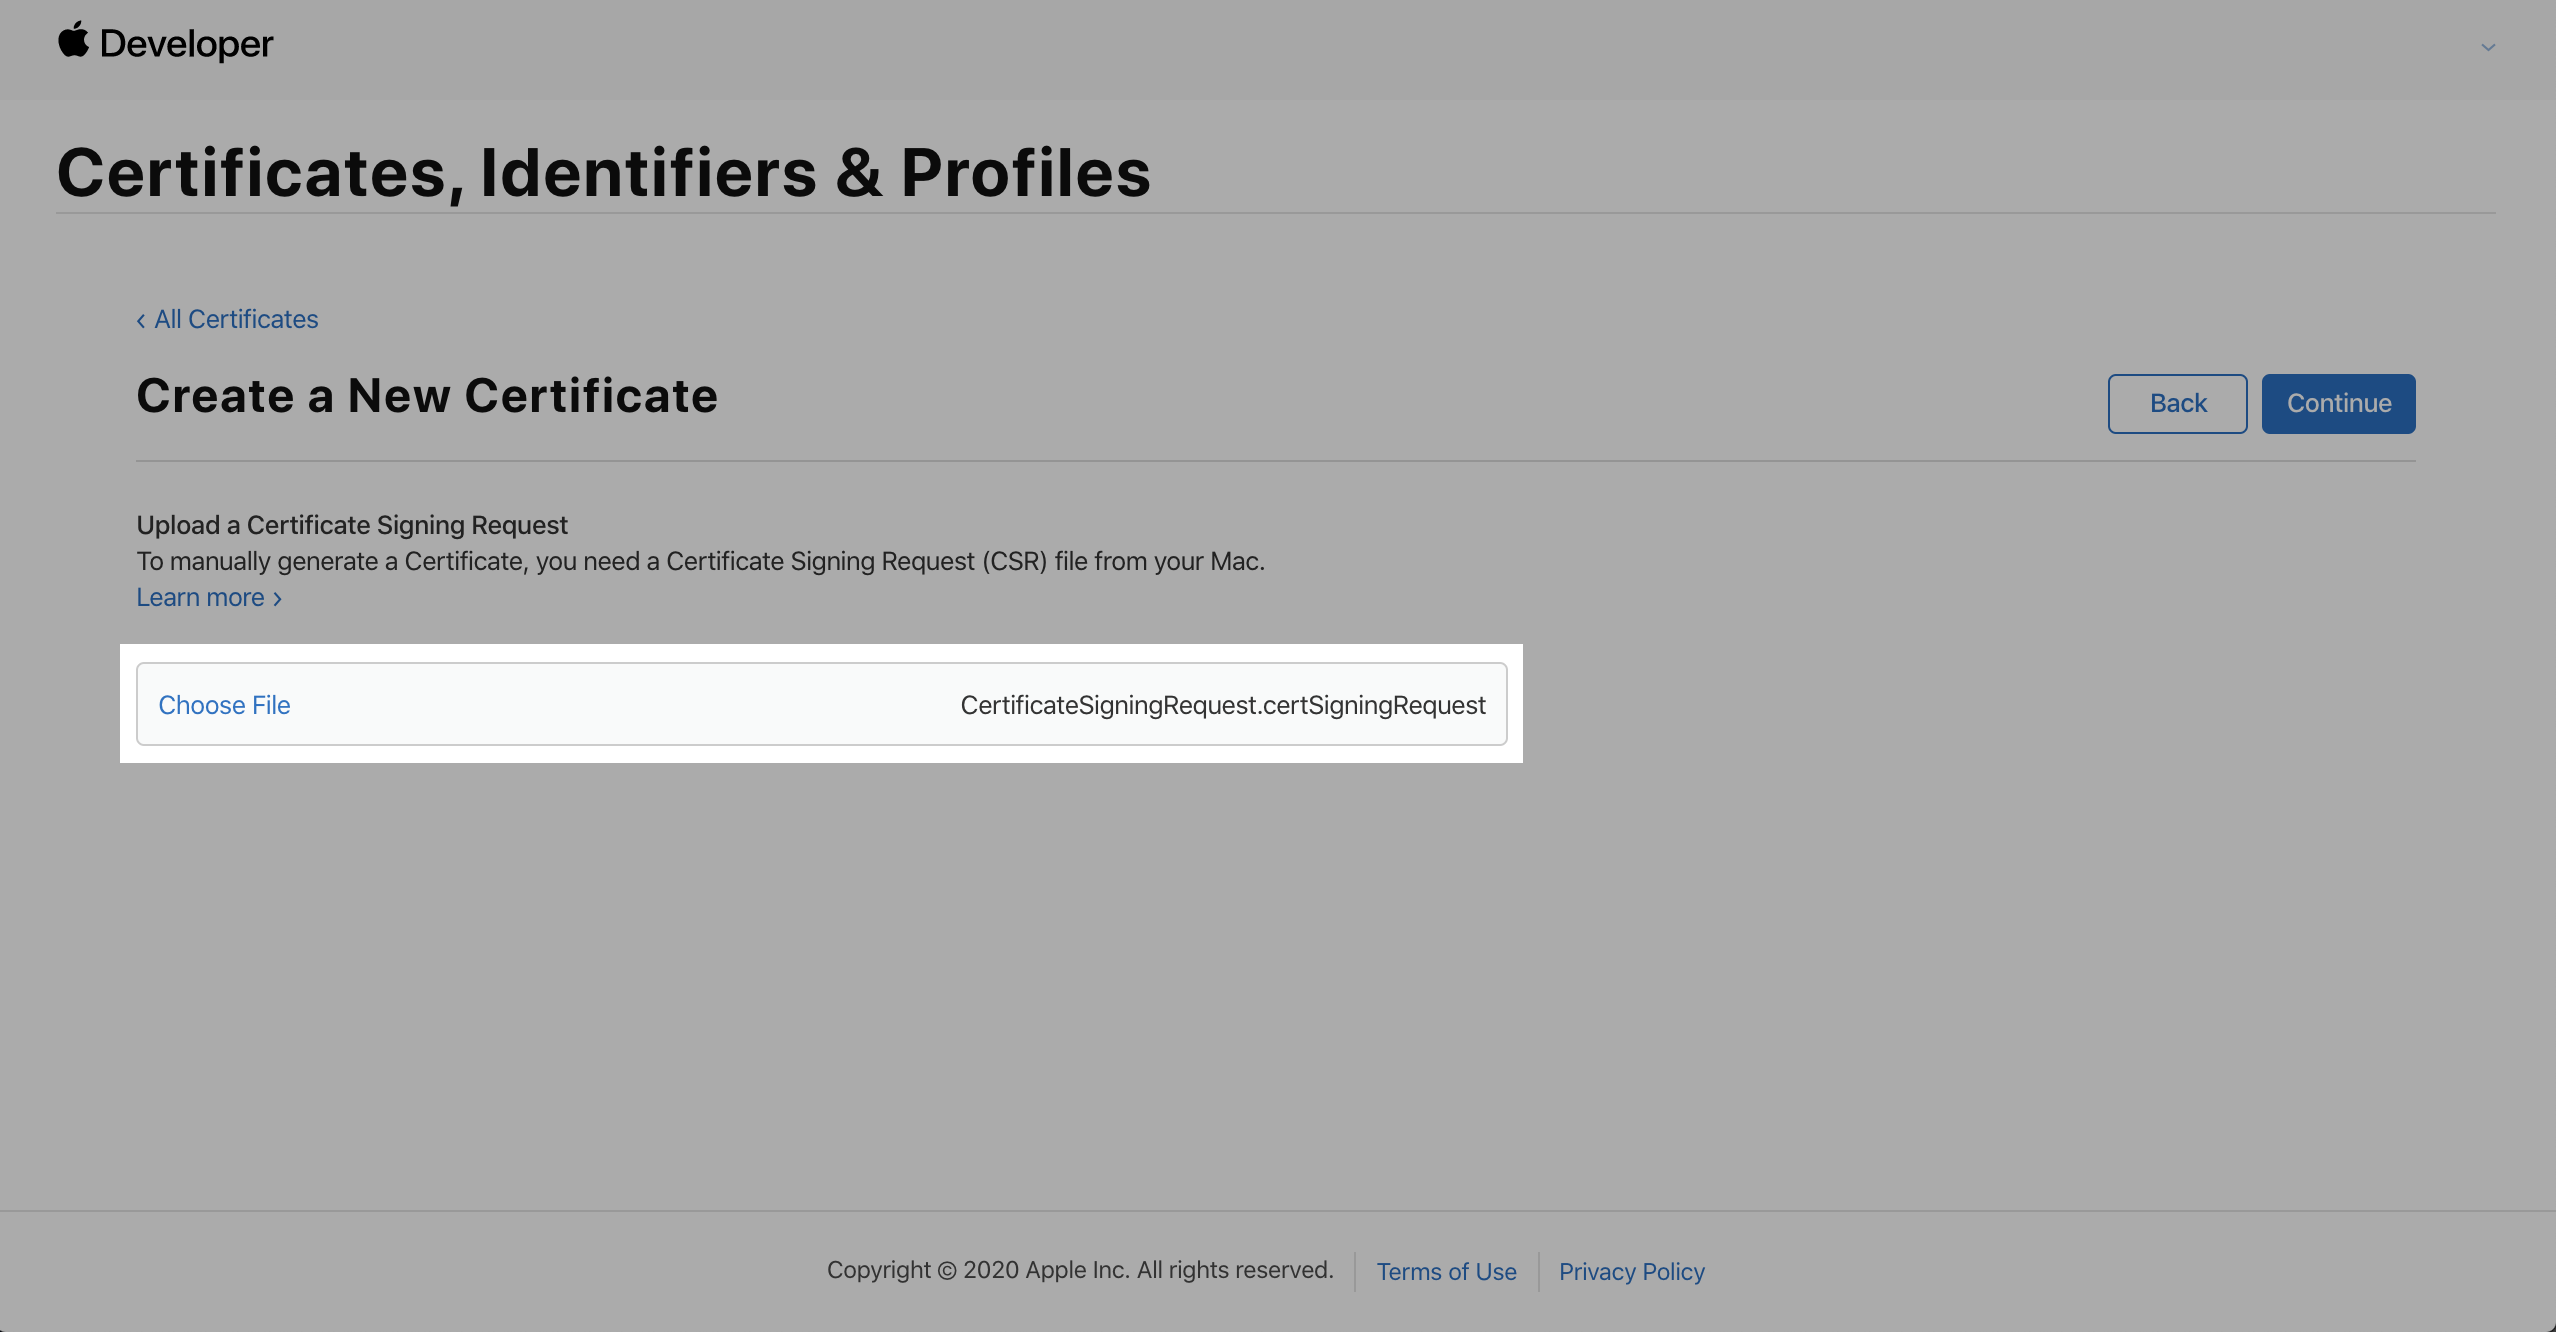
- Click "Choose File", select the created CSR file, and click "Continue".
- Click "Download" to download ios_distribution.cer file to your local disk. Double-click the file to import it into "Keychain Access".
Note:
The .cer file needs to be imported into "Keychain Access" before it can be exported as a .p12 file. Please proceed to the next step.
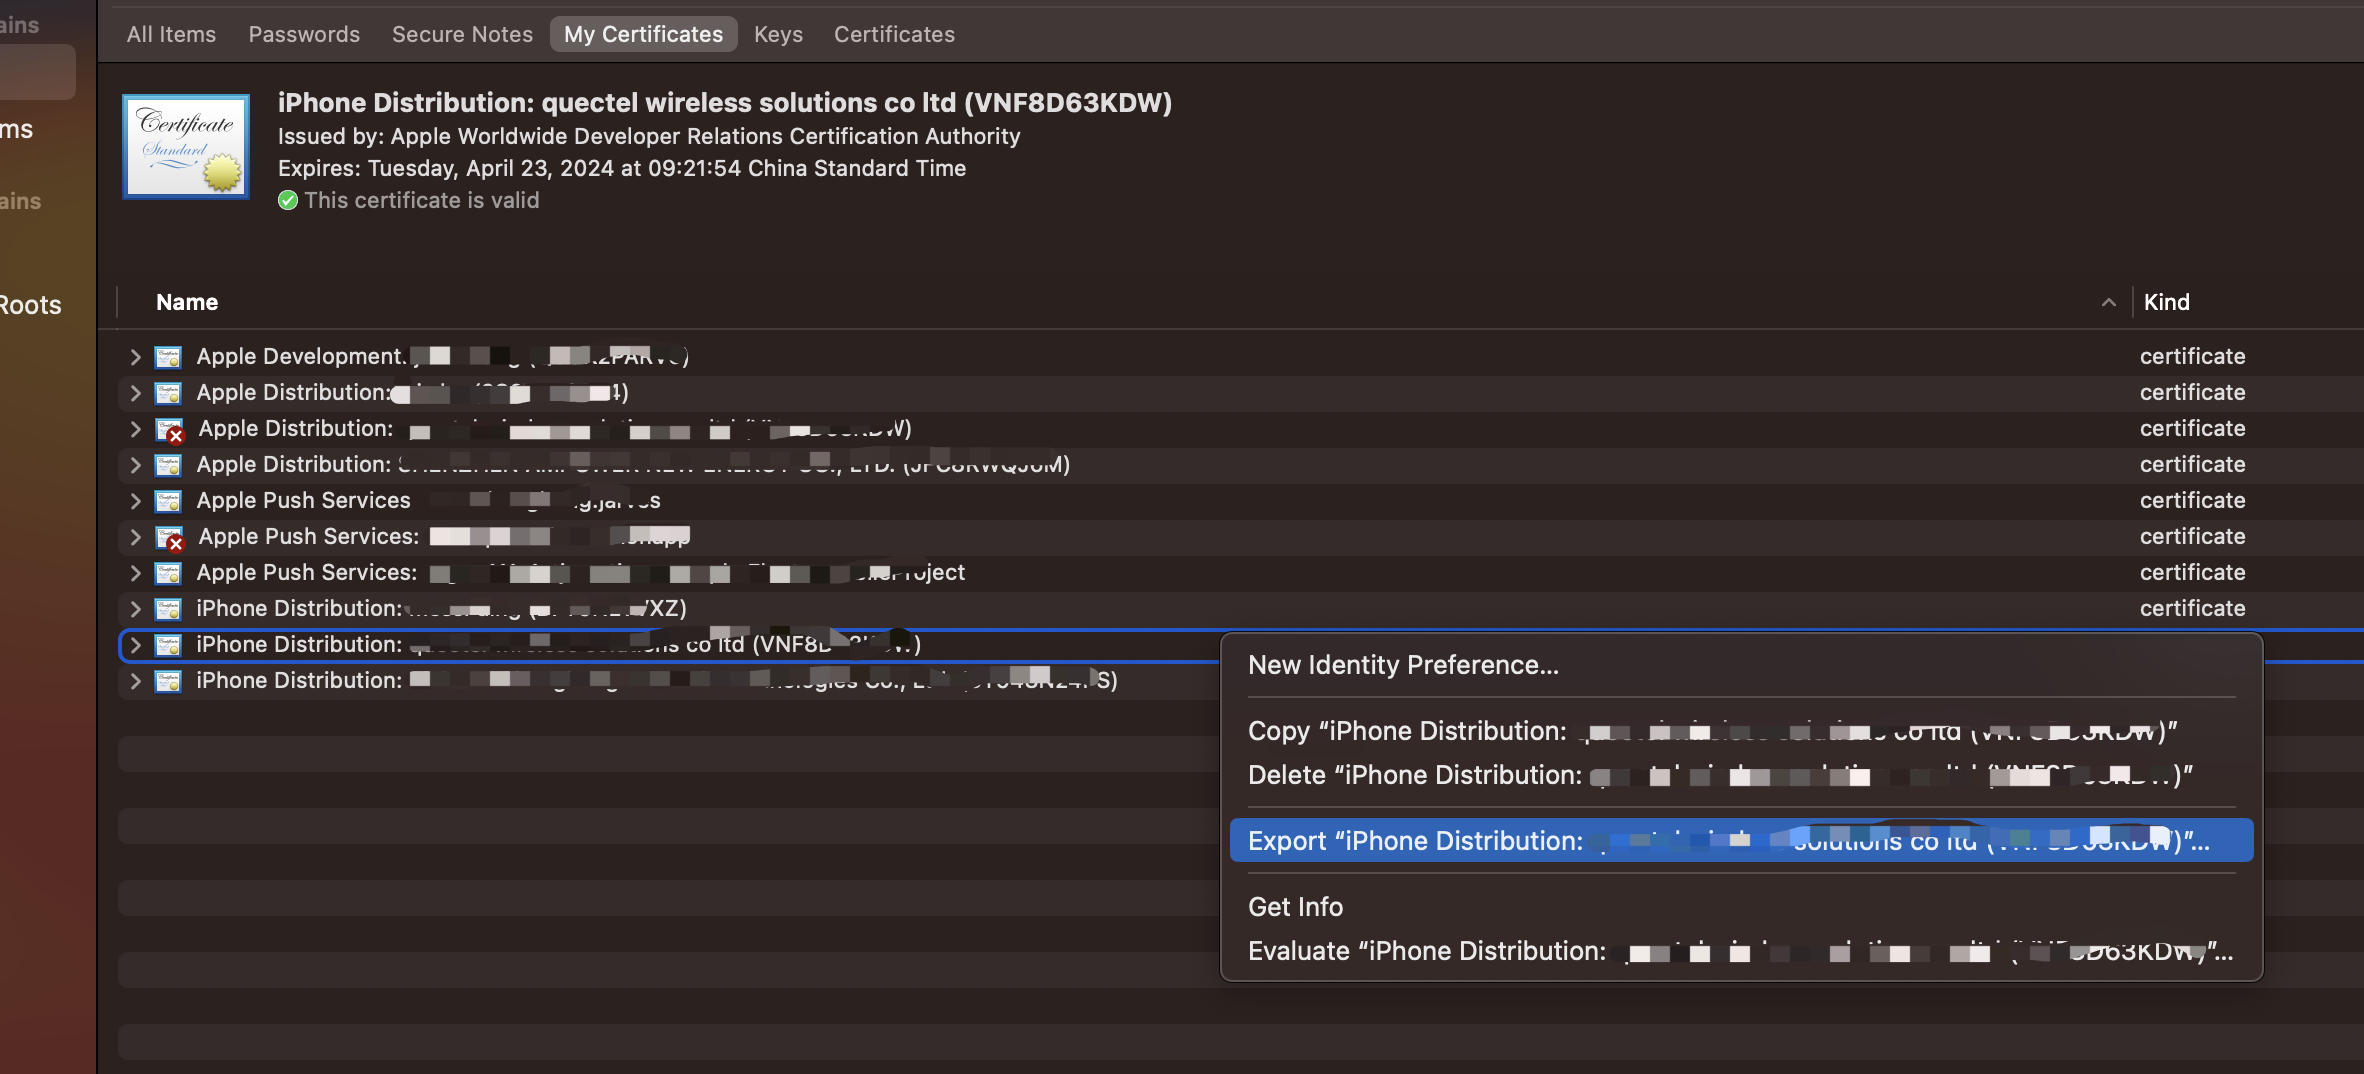
- Open "Keychain Access", select "My Certificates" in the "Category" column, find the imported certificate, right-click and select "Export xxx".
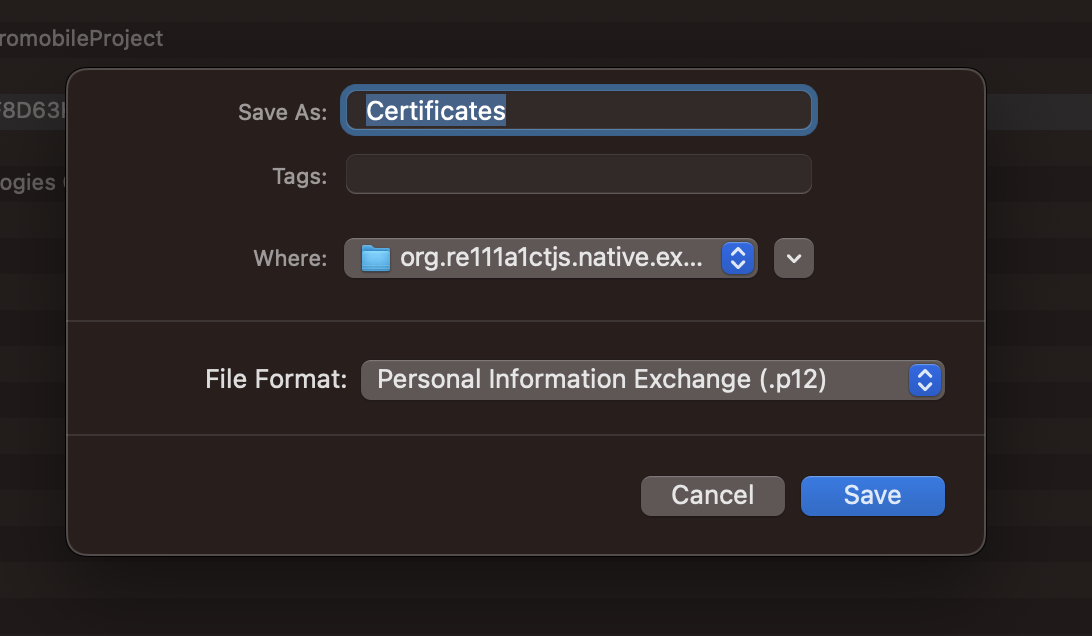
- Save it as "App Distribution Certificate.p12", select the file format as "Personal Information Exchange (.p12)", and click "Save".
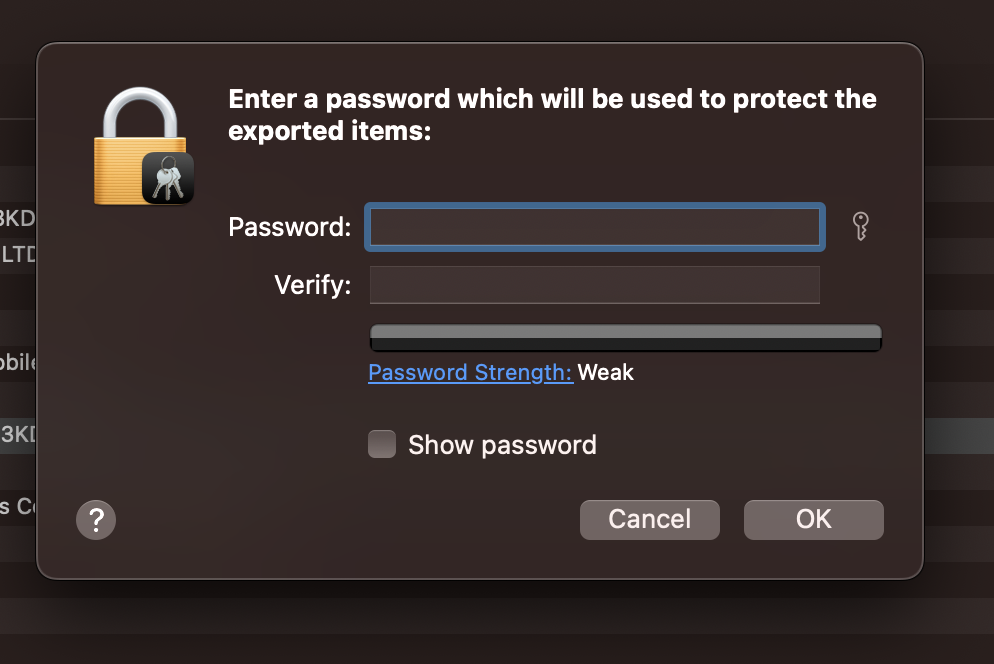
- You do not need to set a password. Just click "OK" to save the certificate.
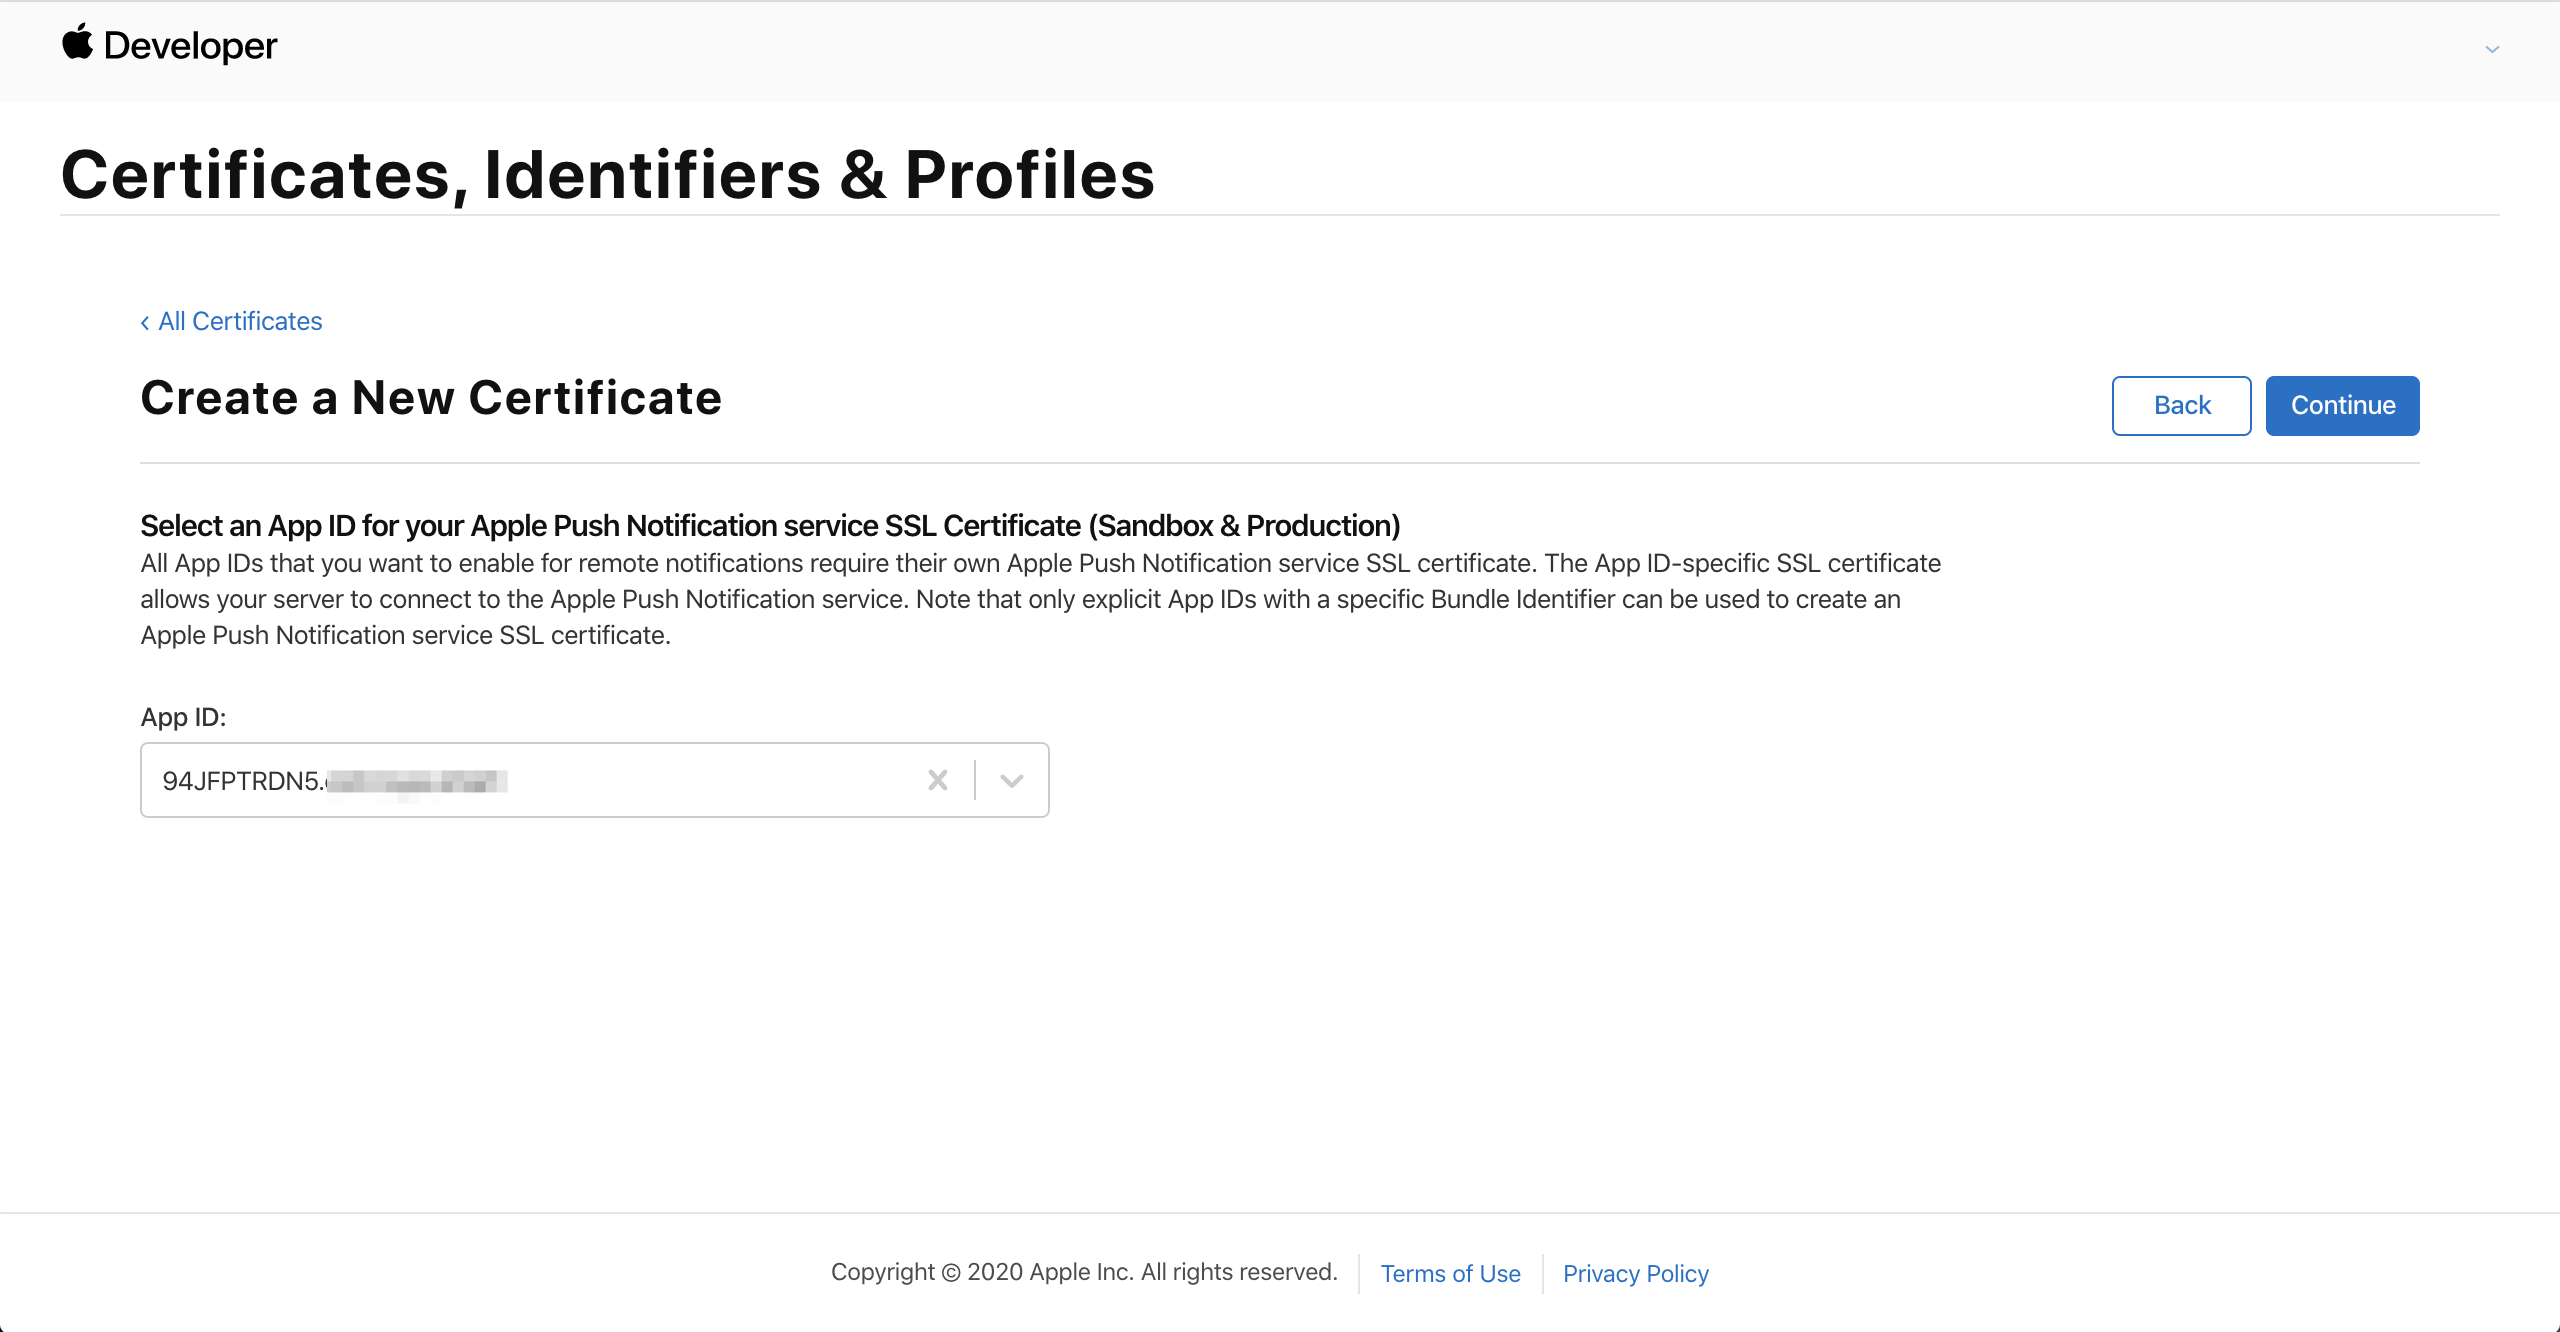
Create App Push Certificate (.p12 Format)
Unlike an app distribution certificate, if you have multiple apps under your account, each app requires an app push certificate.
- Open the "Certificates, Identifiers & Profiles" page, select "Certificates", and click "+".

- Select "Apple Push Notification service SSL (Sandbox & Production)" and click "Continue".

- Select the app's bundle ID in the "App ID" field and click "Continue".
- Click "Choose File", select the created CSR file, and click "Continue".

- Click "Download" to download aps.cer file to your local disk. Double-click the file to import it into "Keychain Access".
Note:
The .cer file needs to be imported into "Keychain Access" before it can be exported as a .p12 file. Please continue with the next step.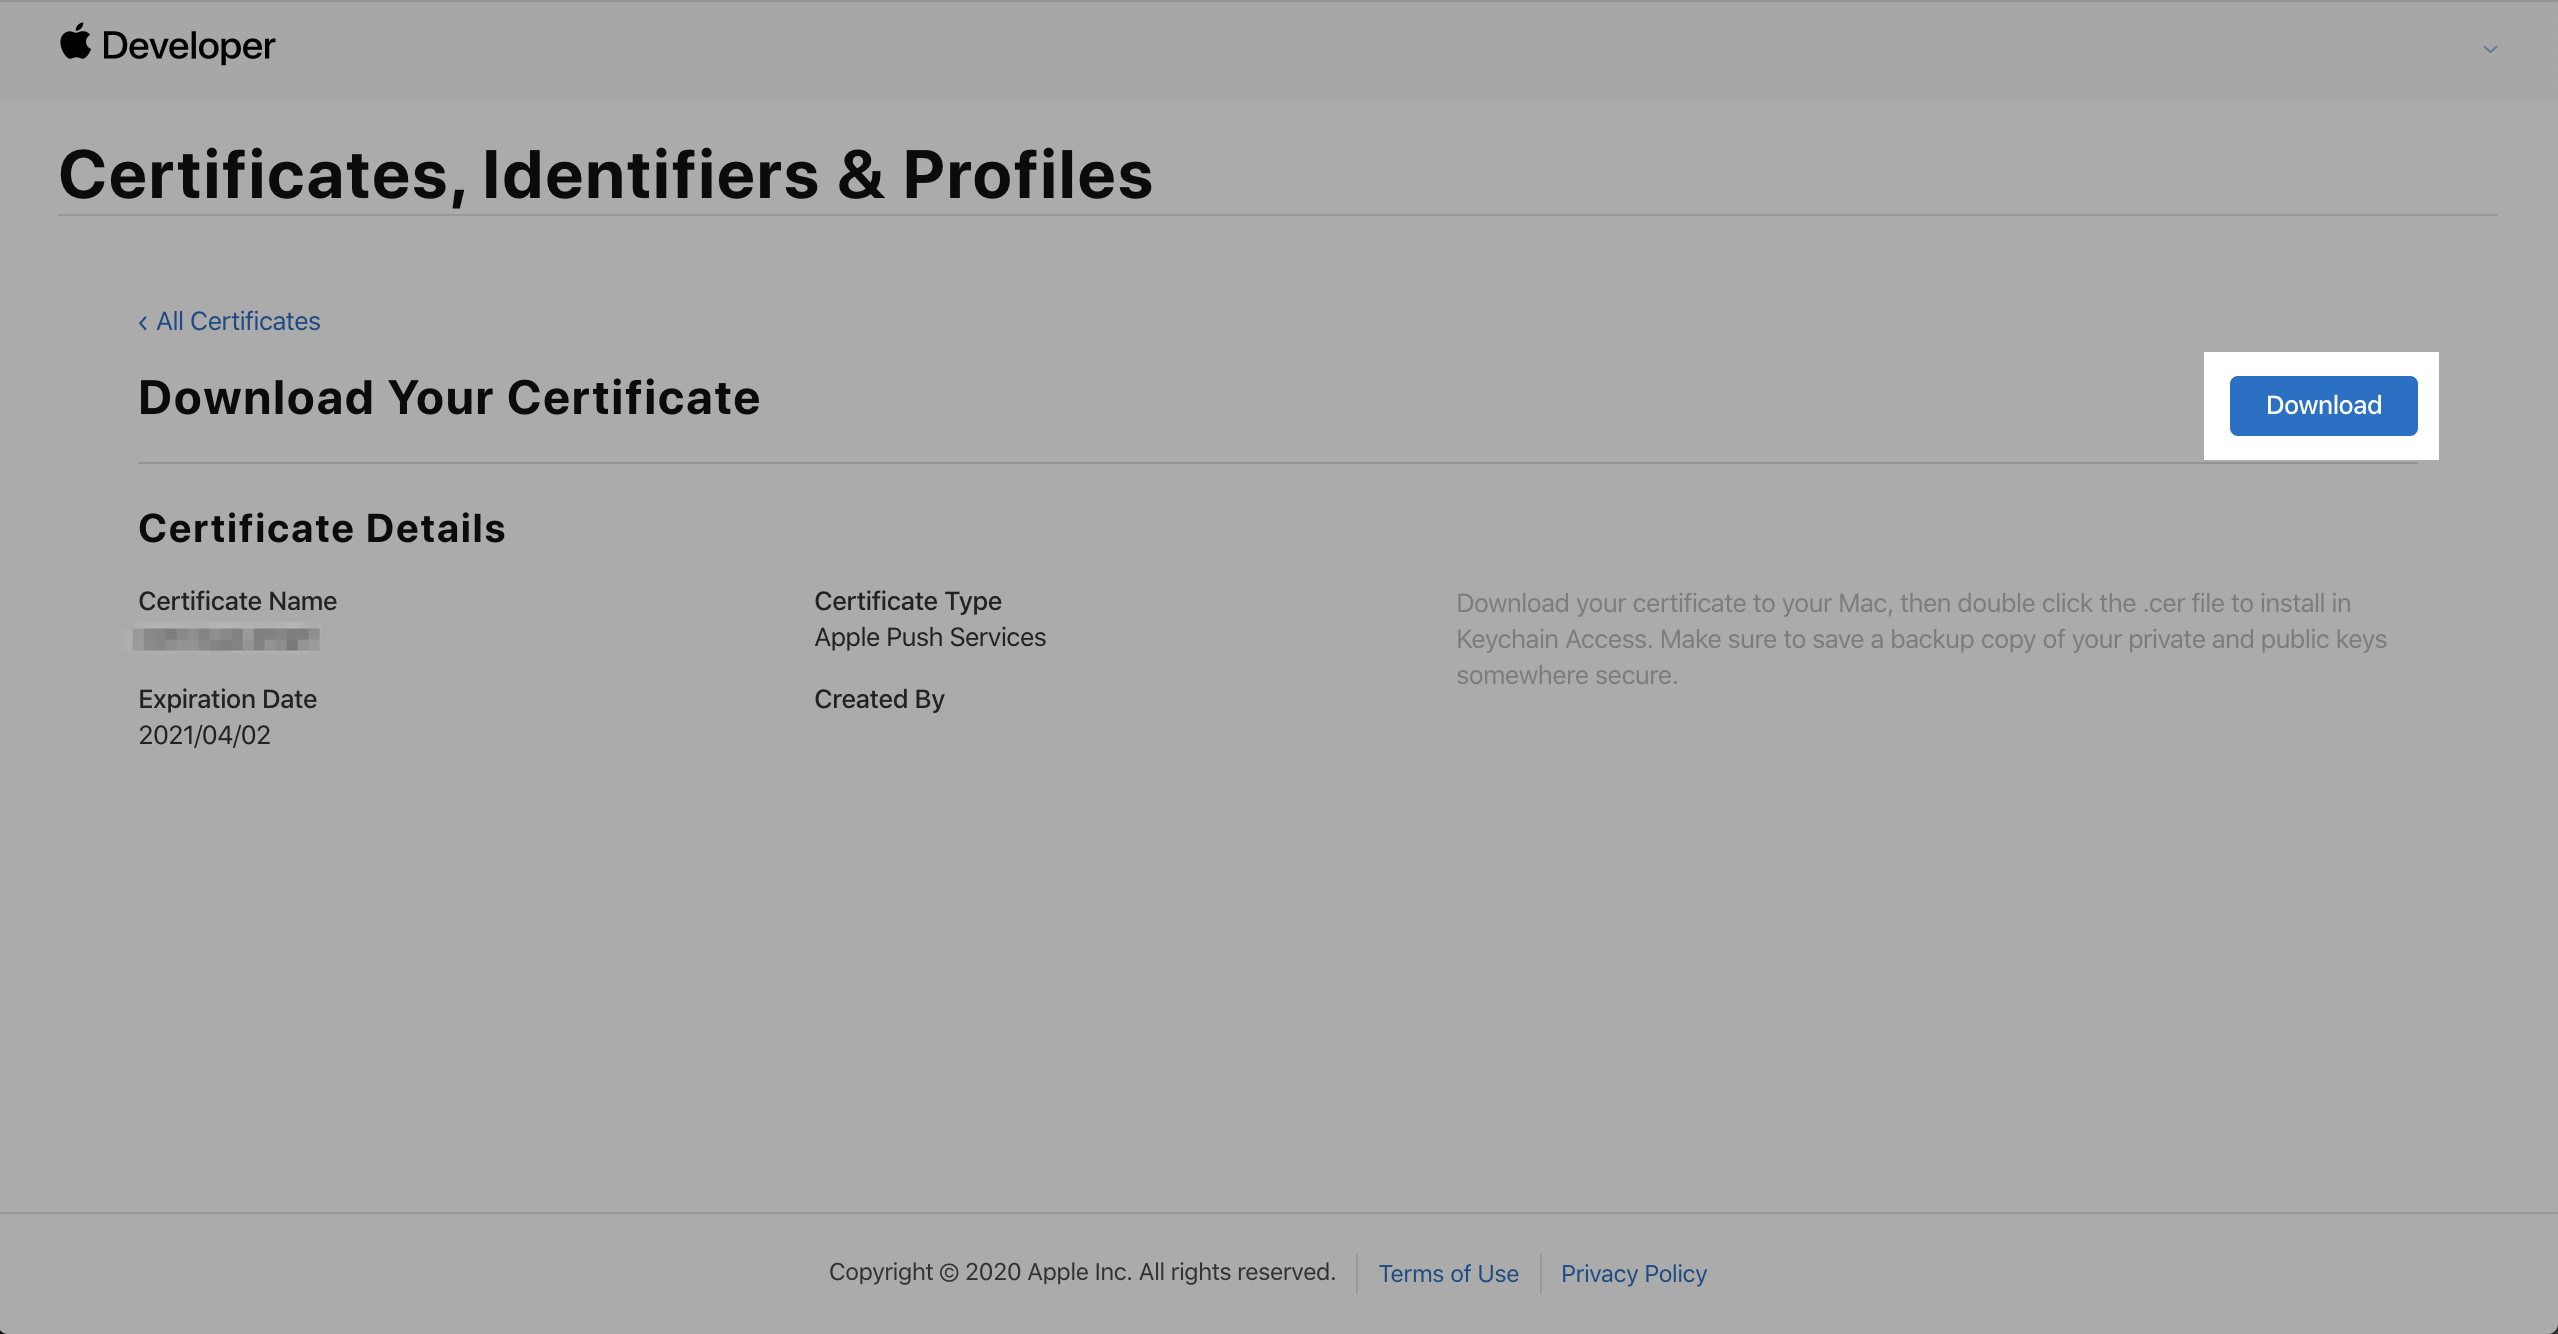
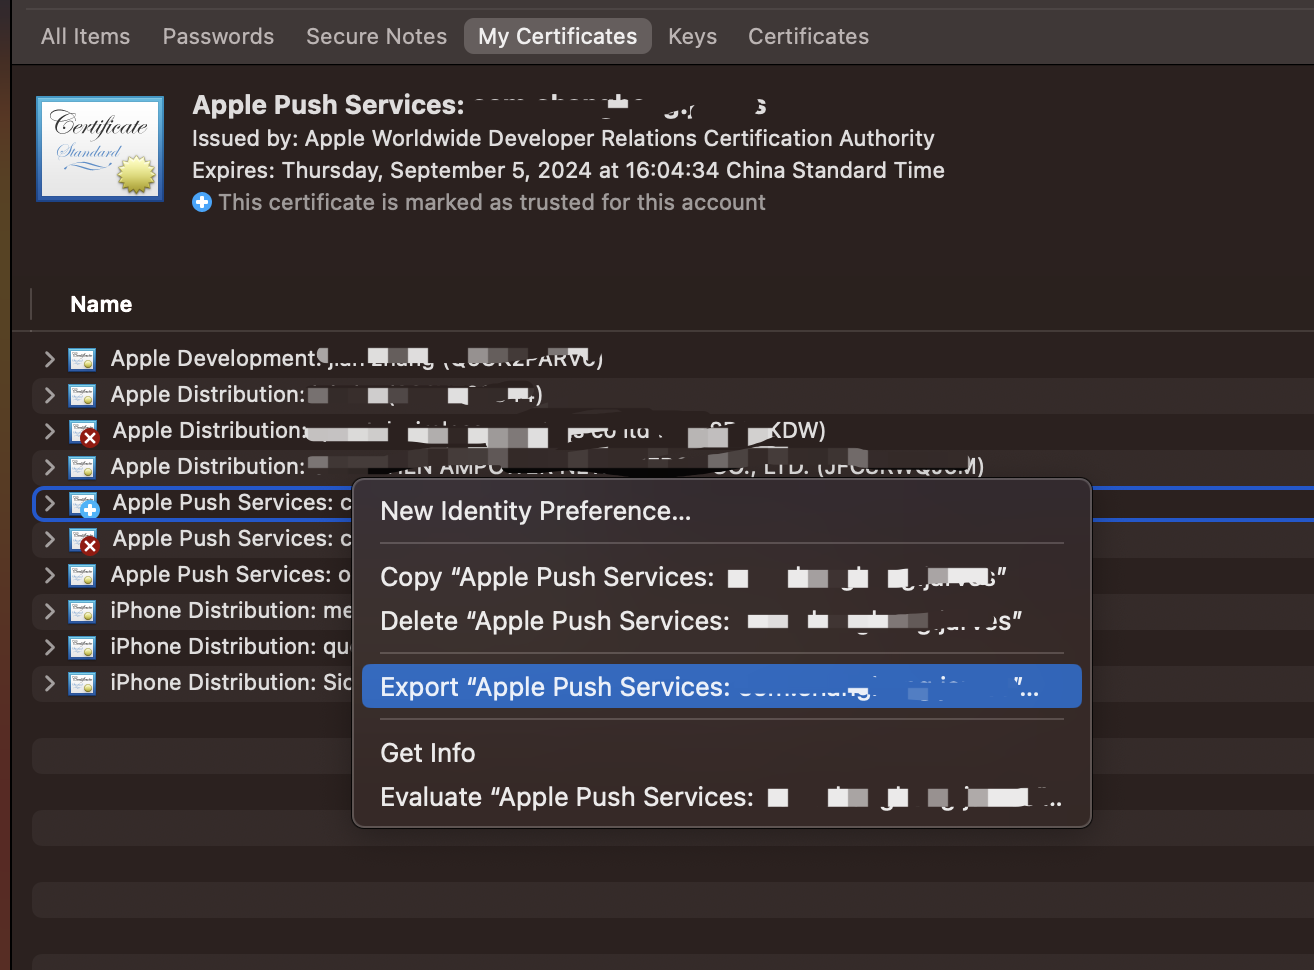
- Open "Keychain Access", select "My Certificates" in the "Category" column, find the imported certificate, right-click and select "Export xxx".
- Save it as "App Push Certificate.p12", select the file format as "Personal Information Exchange (.p12)", and click "Save".
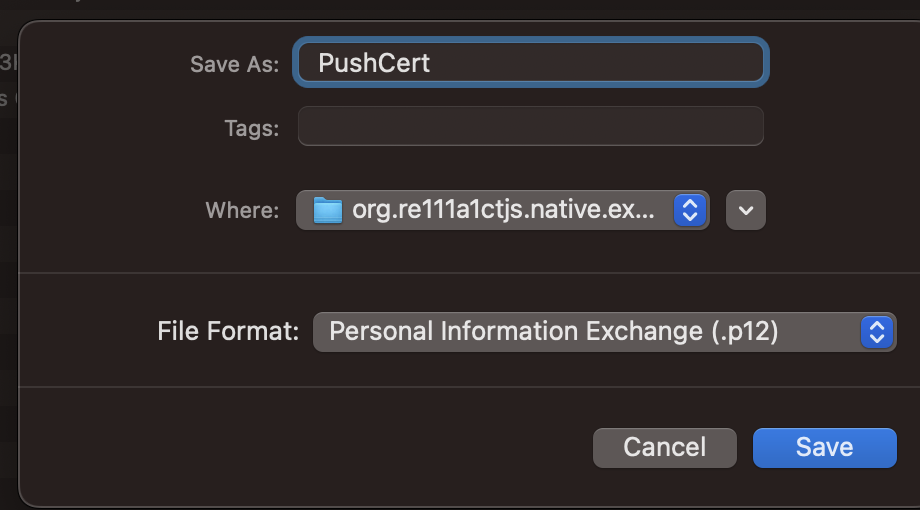
- Create a password for the push certificate and make sure to record it. Click "OK" to save the certificate.

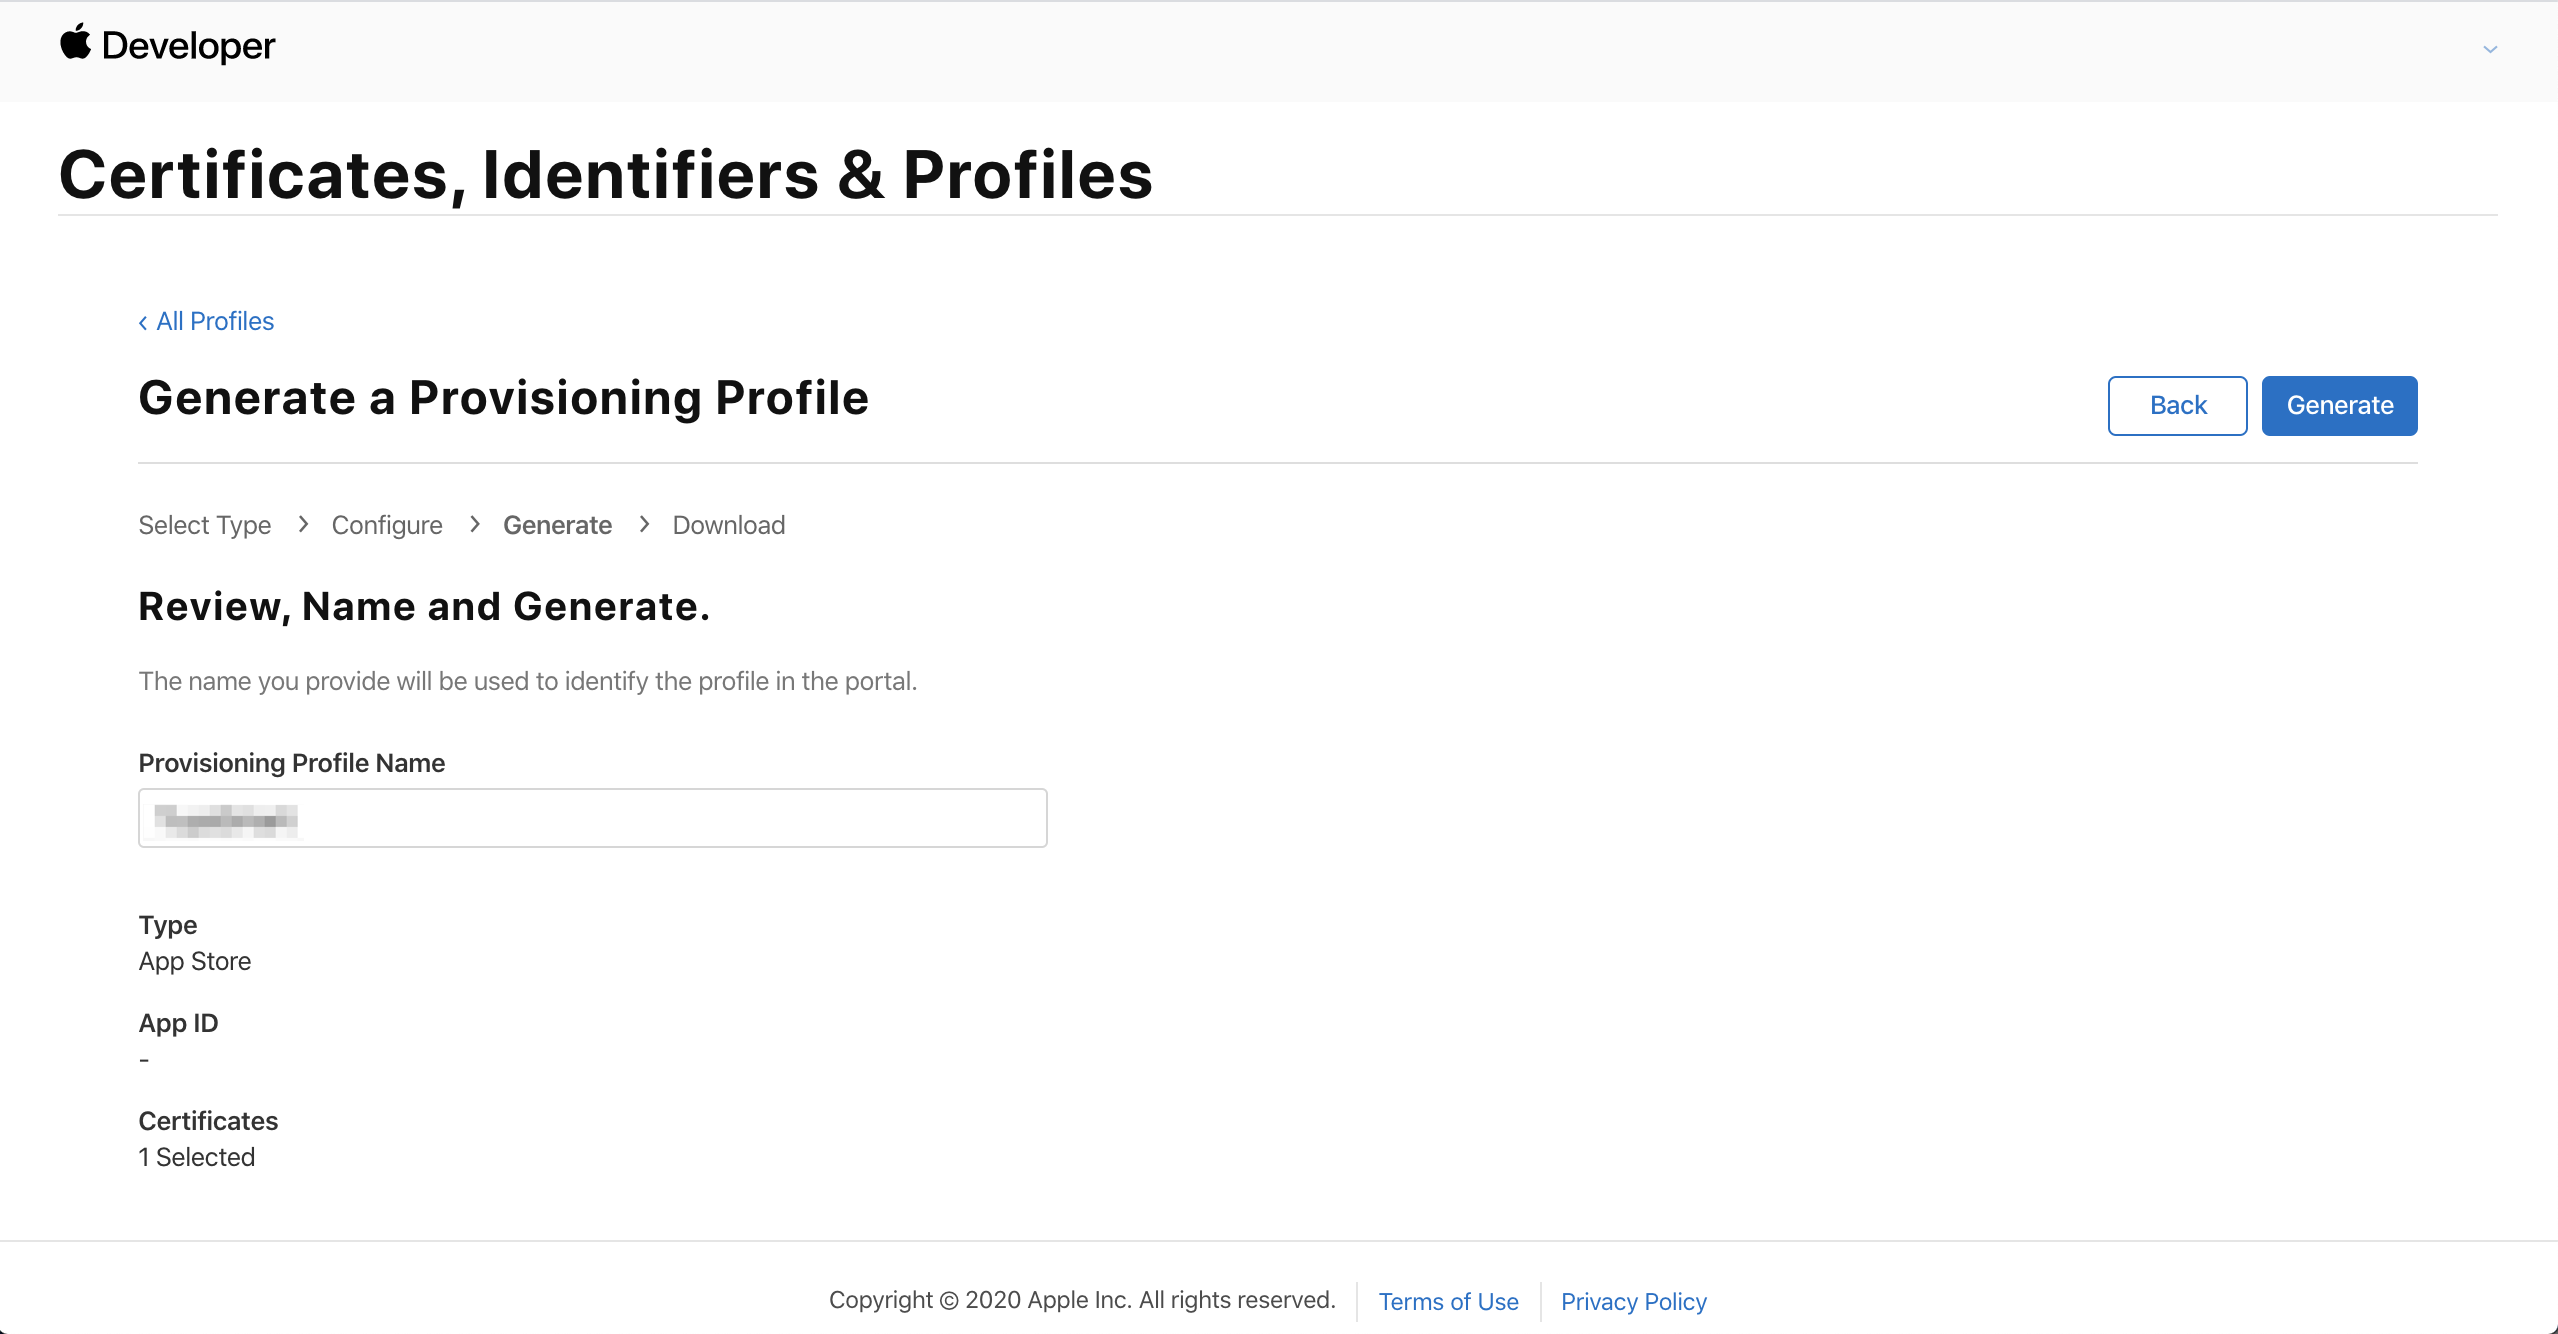
Create App Provisioning Profile (.mobileprovison Format)
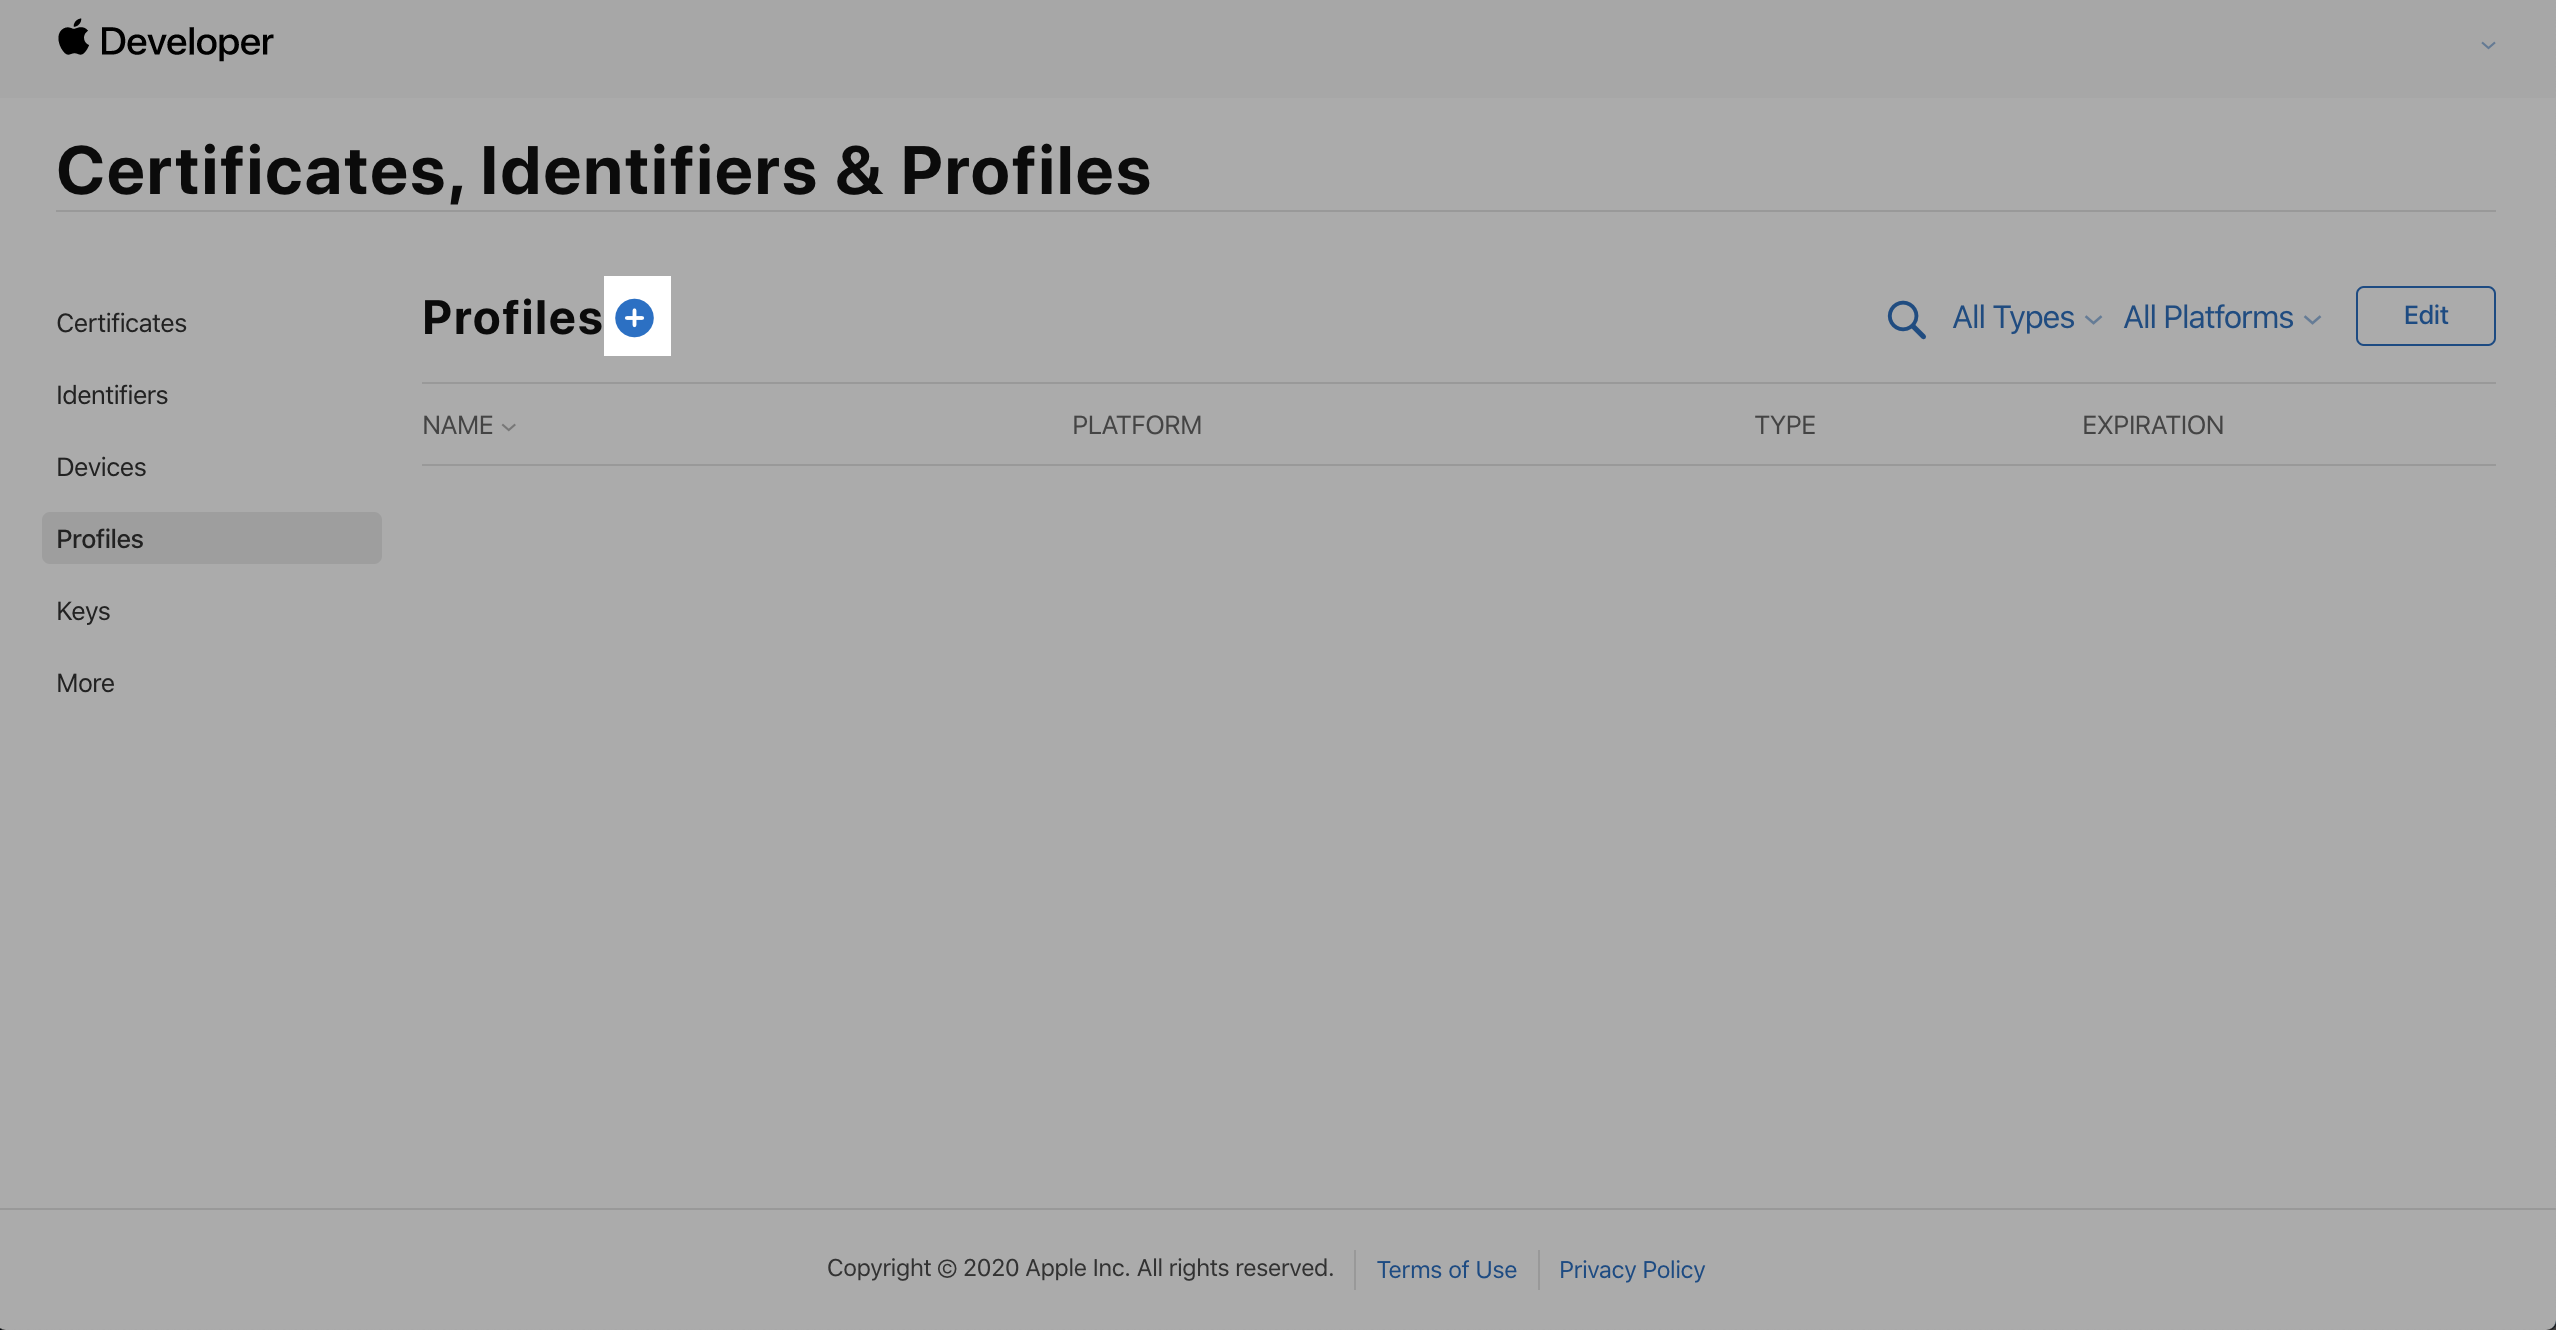
- Open the "Certificates, Identifiers & Profiles" page, select "Profiles", and click "+".
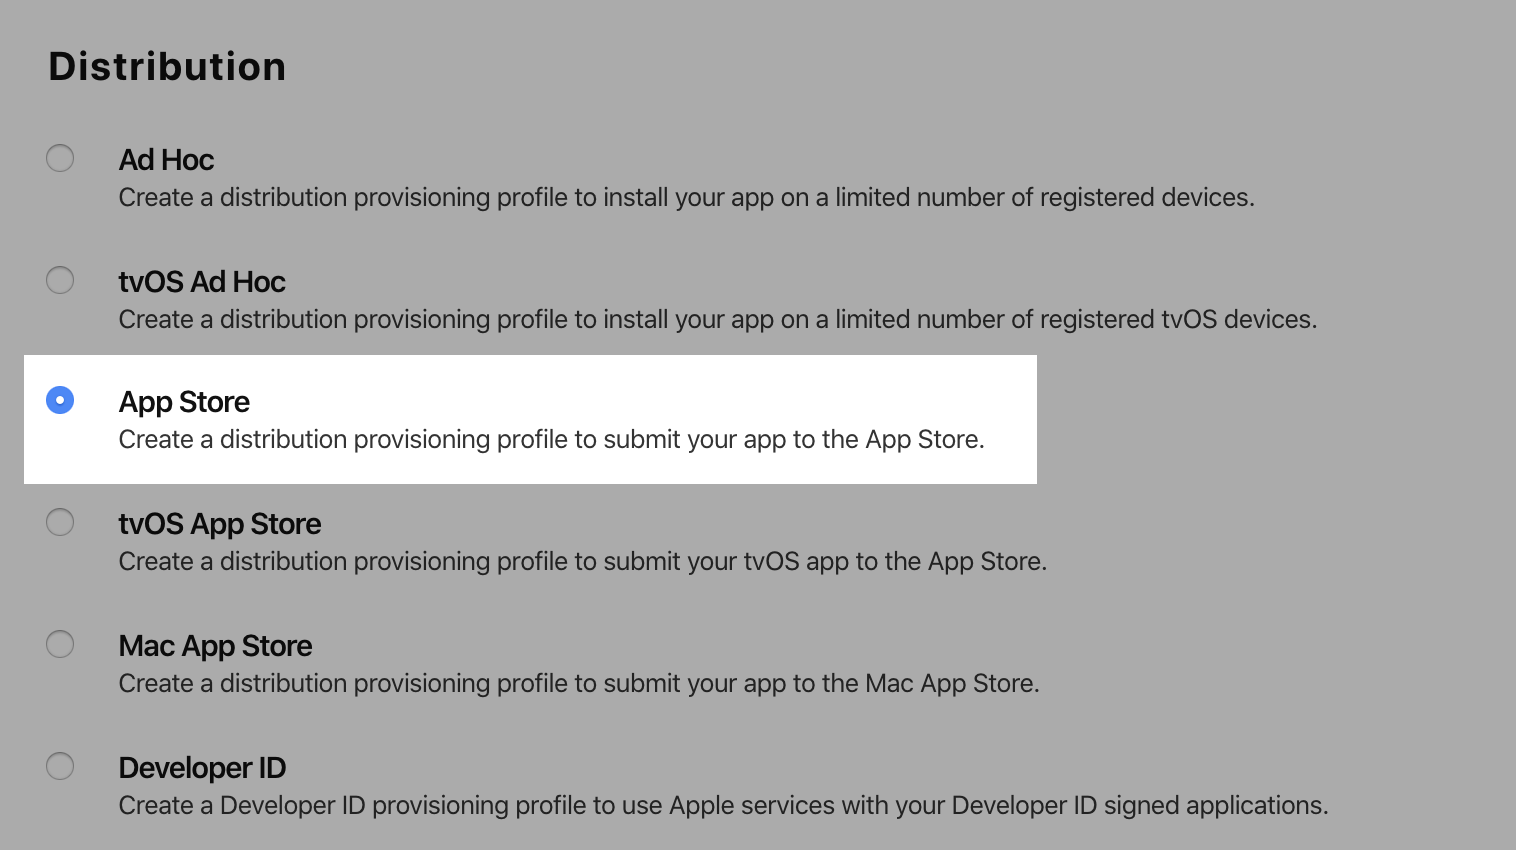
- Select "App Store" and click "Continue".
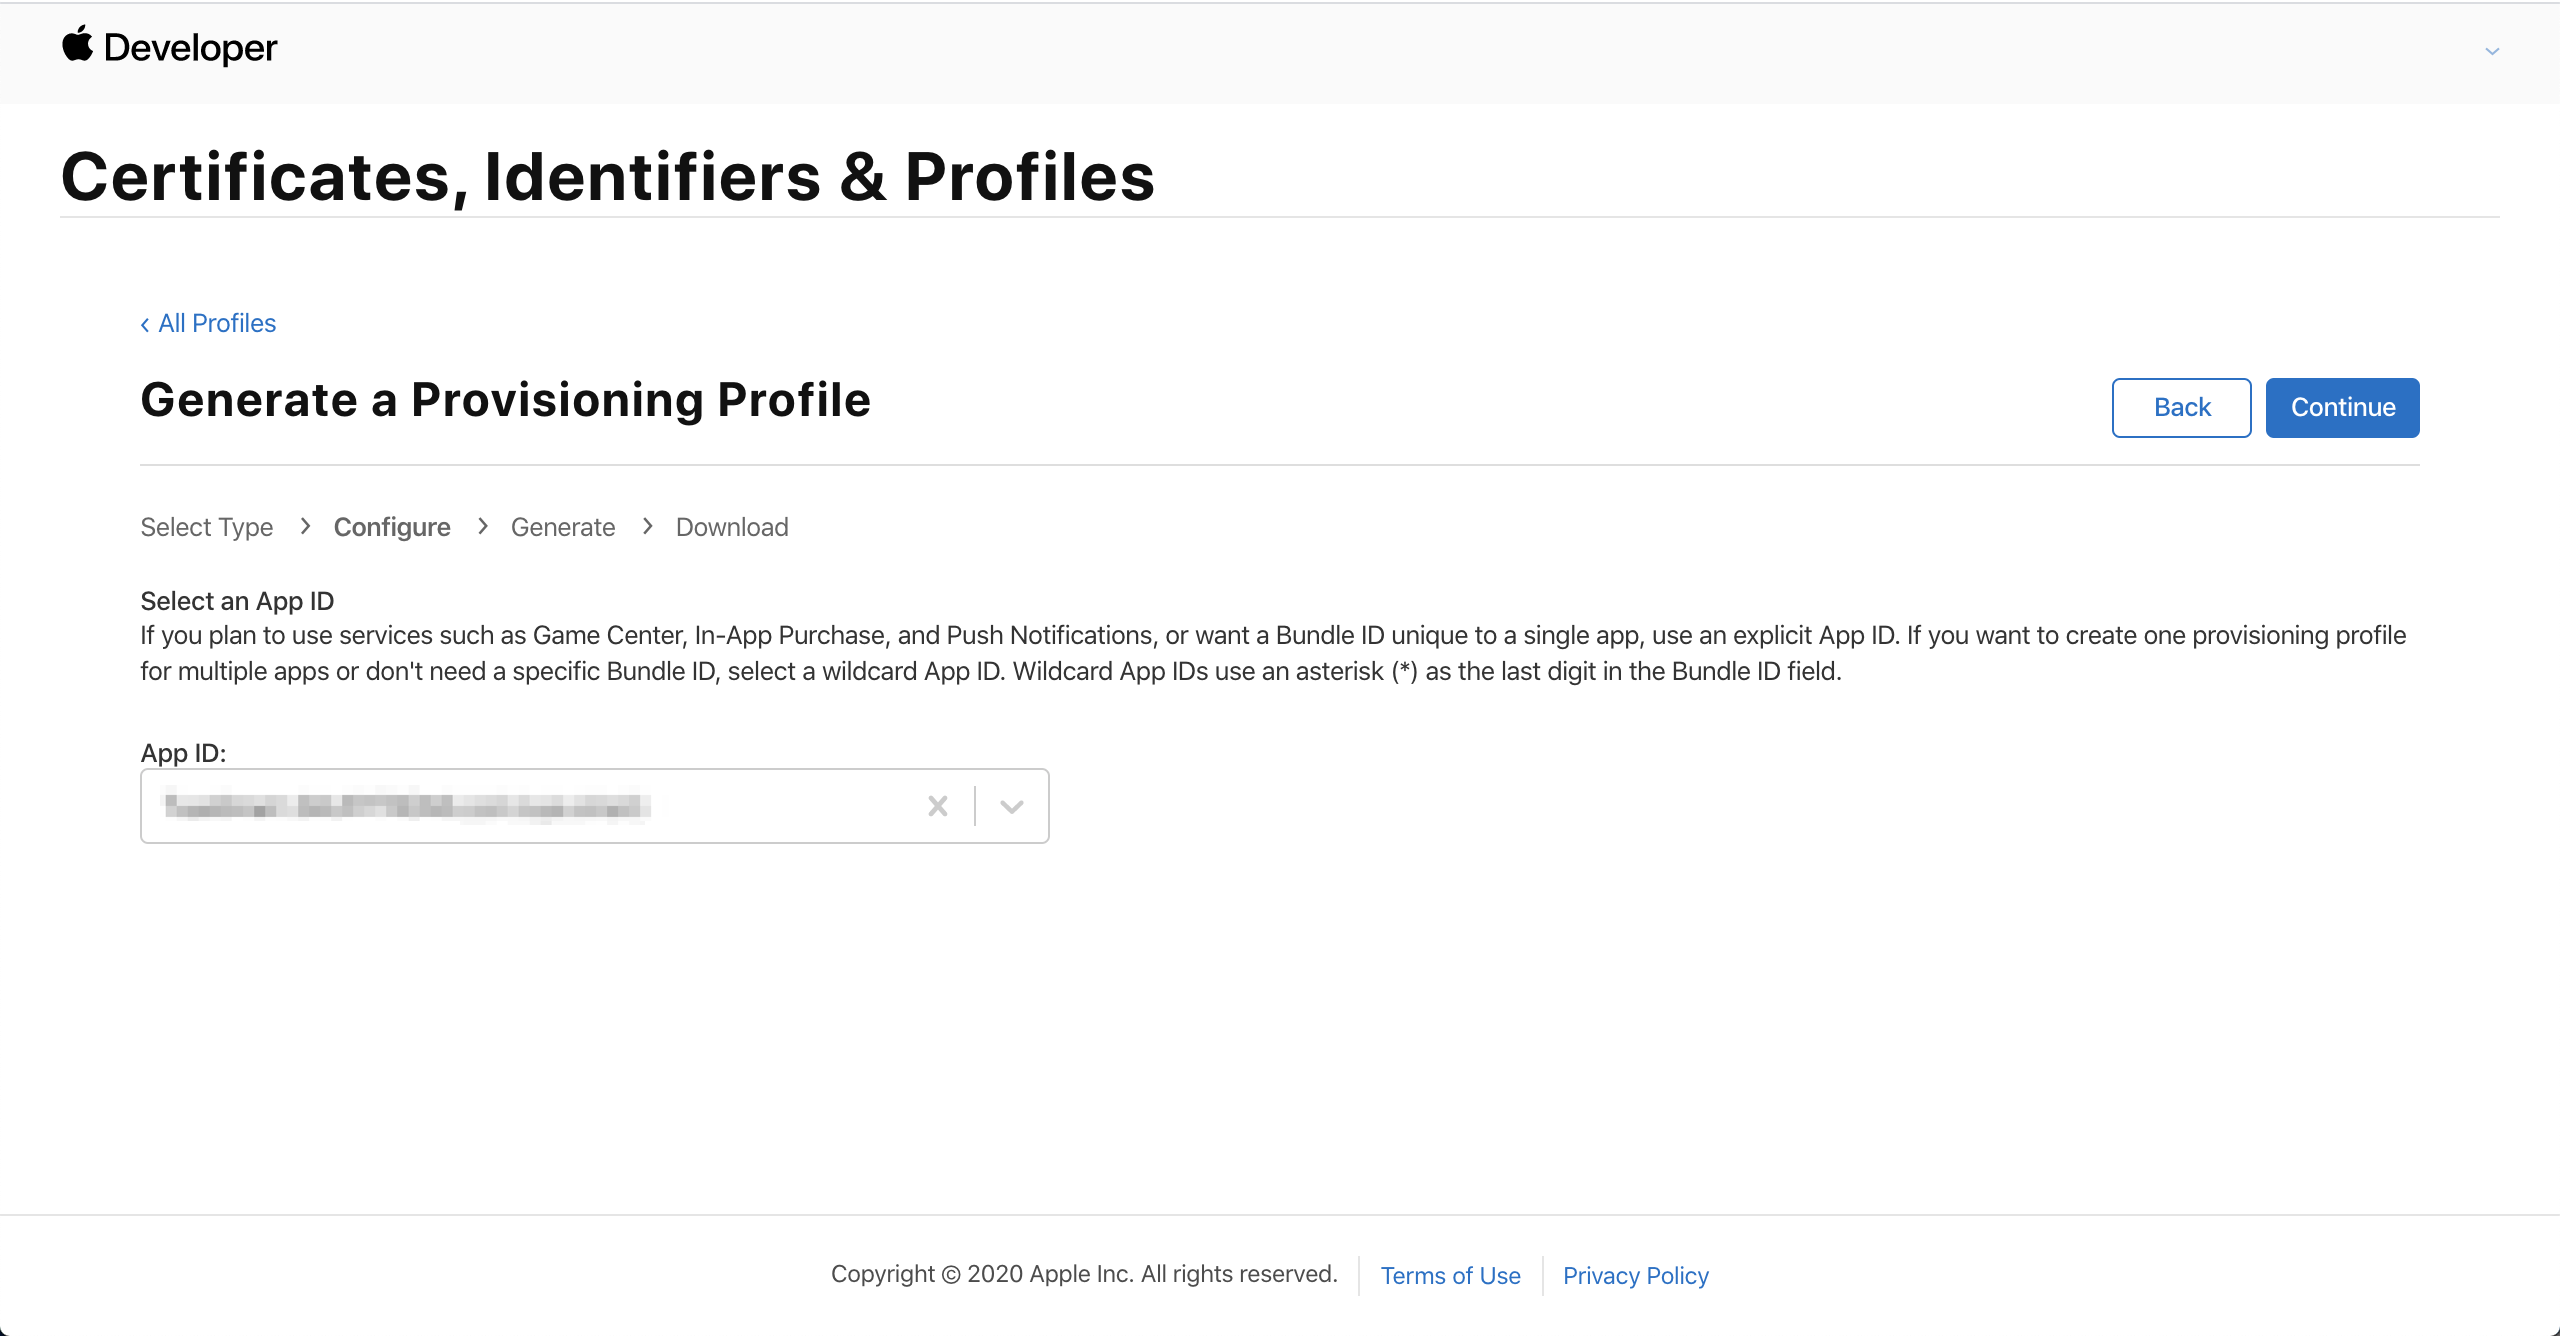
- Select the app's bundle ID and click "Continue".
- Select the created app distribution certificate and click "Continue".
Note:
If there are multiple certificates on the page, you can distinguish them by the expiration date. A certificate is valid for 1 year. If you cannot distinguish them, it is recommended to return to the certificate list page, delete the redundant certificates, and restart this step. Selecting the wrong certificate in this step will result in a build failure.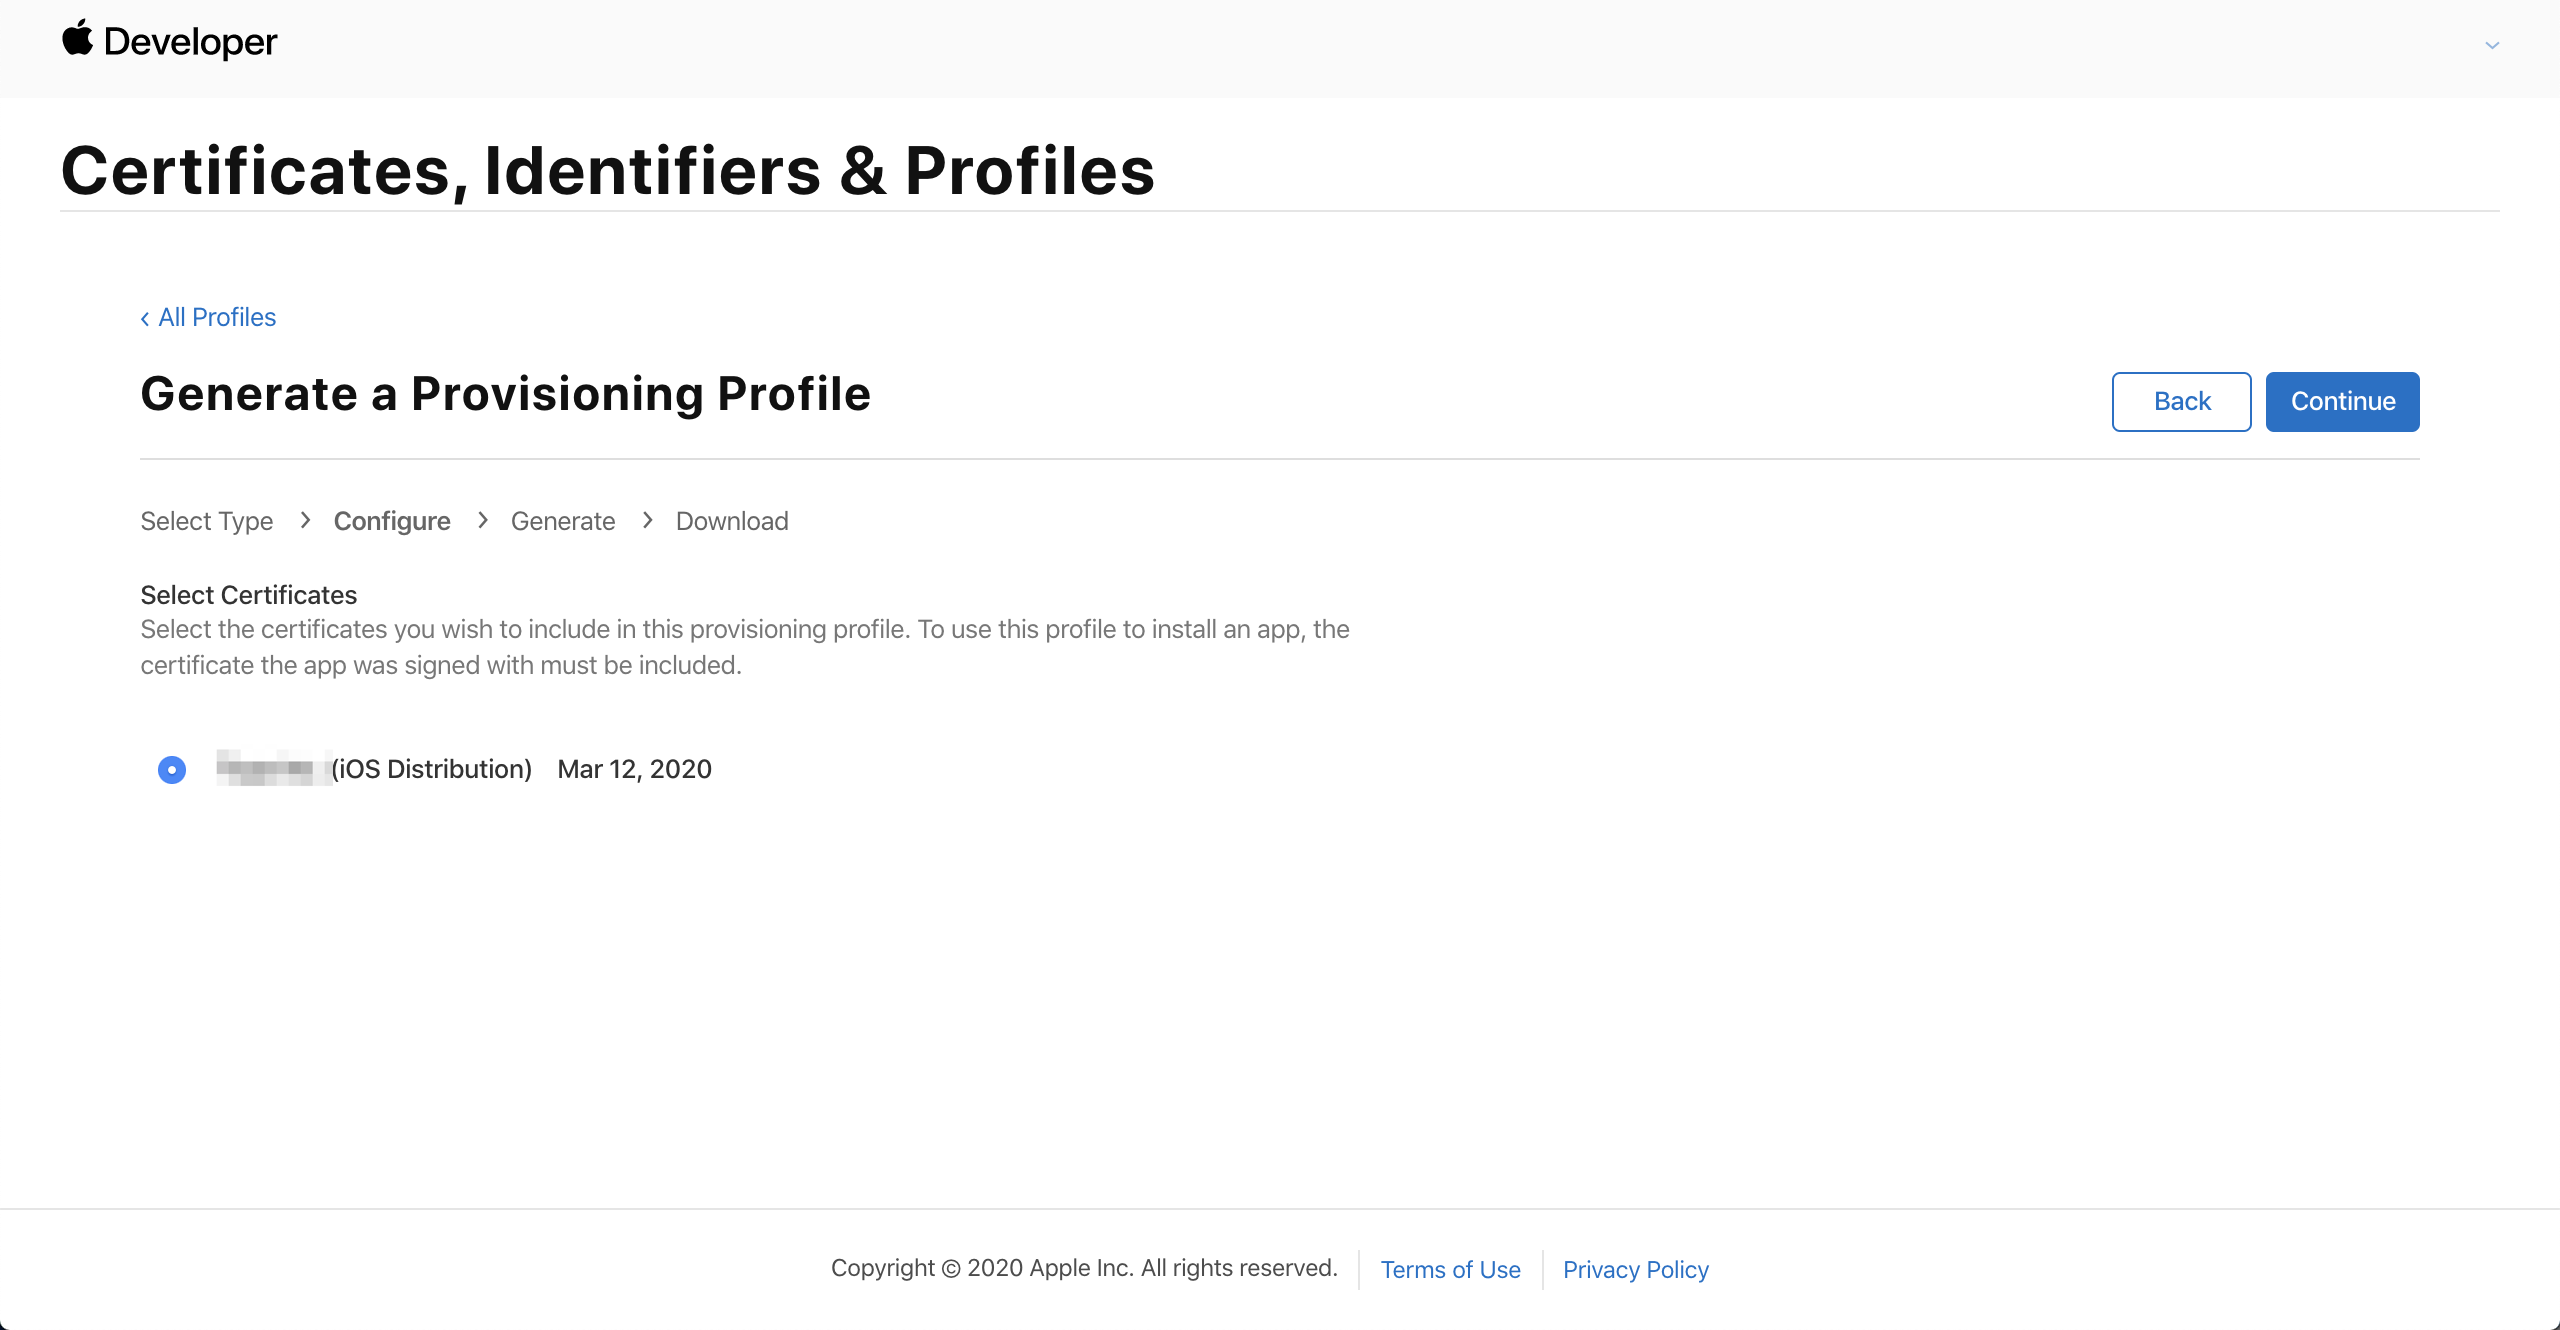
- Enter your app's name in the "Provisioning Profile Name" field and click "Generate".
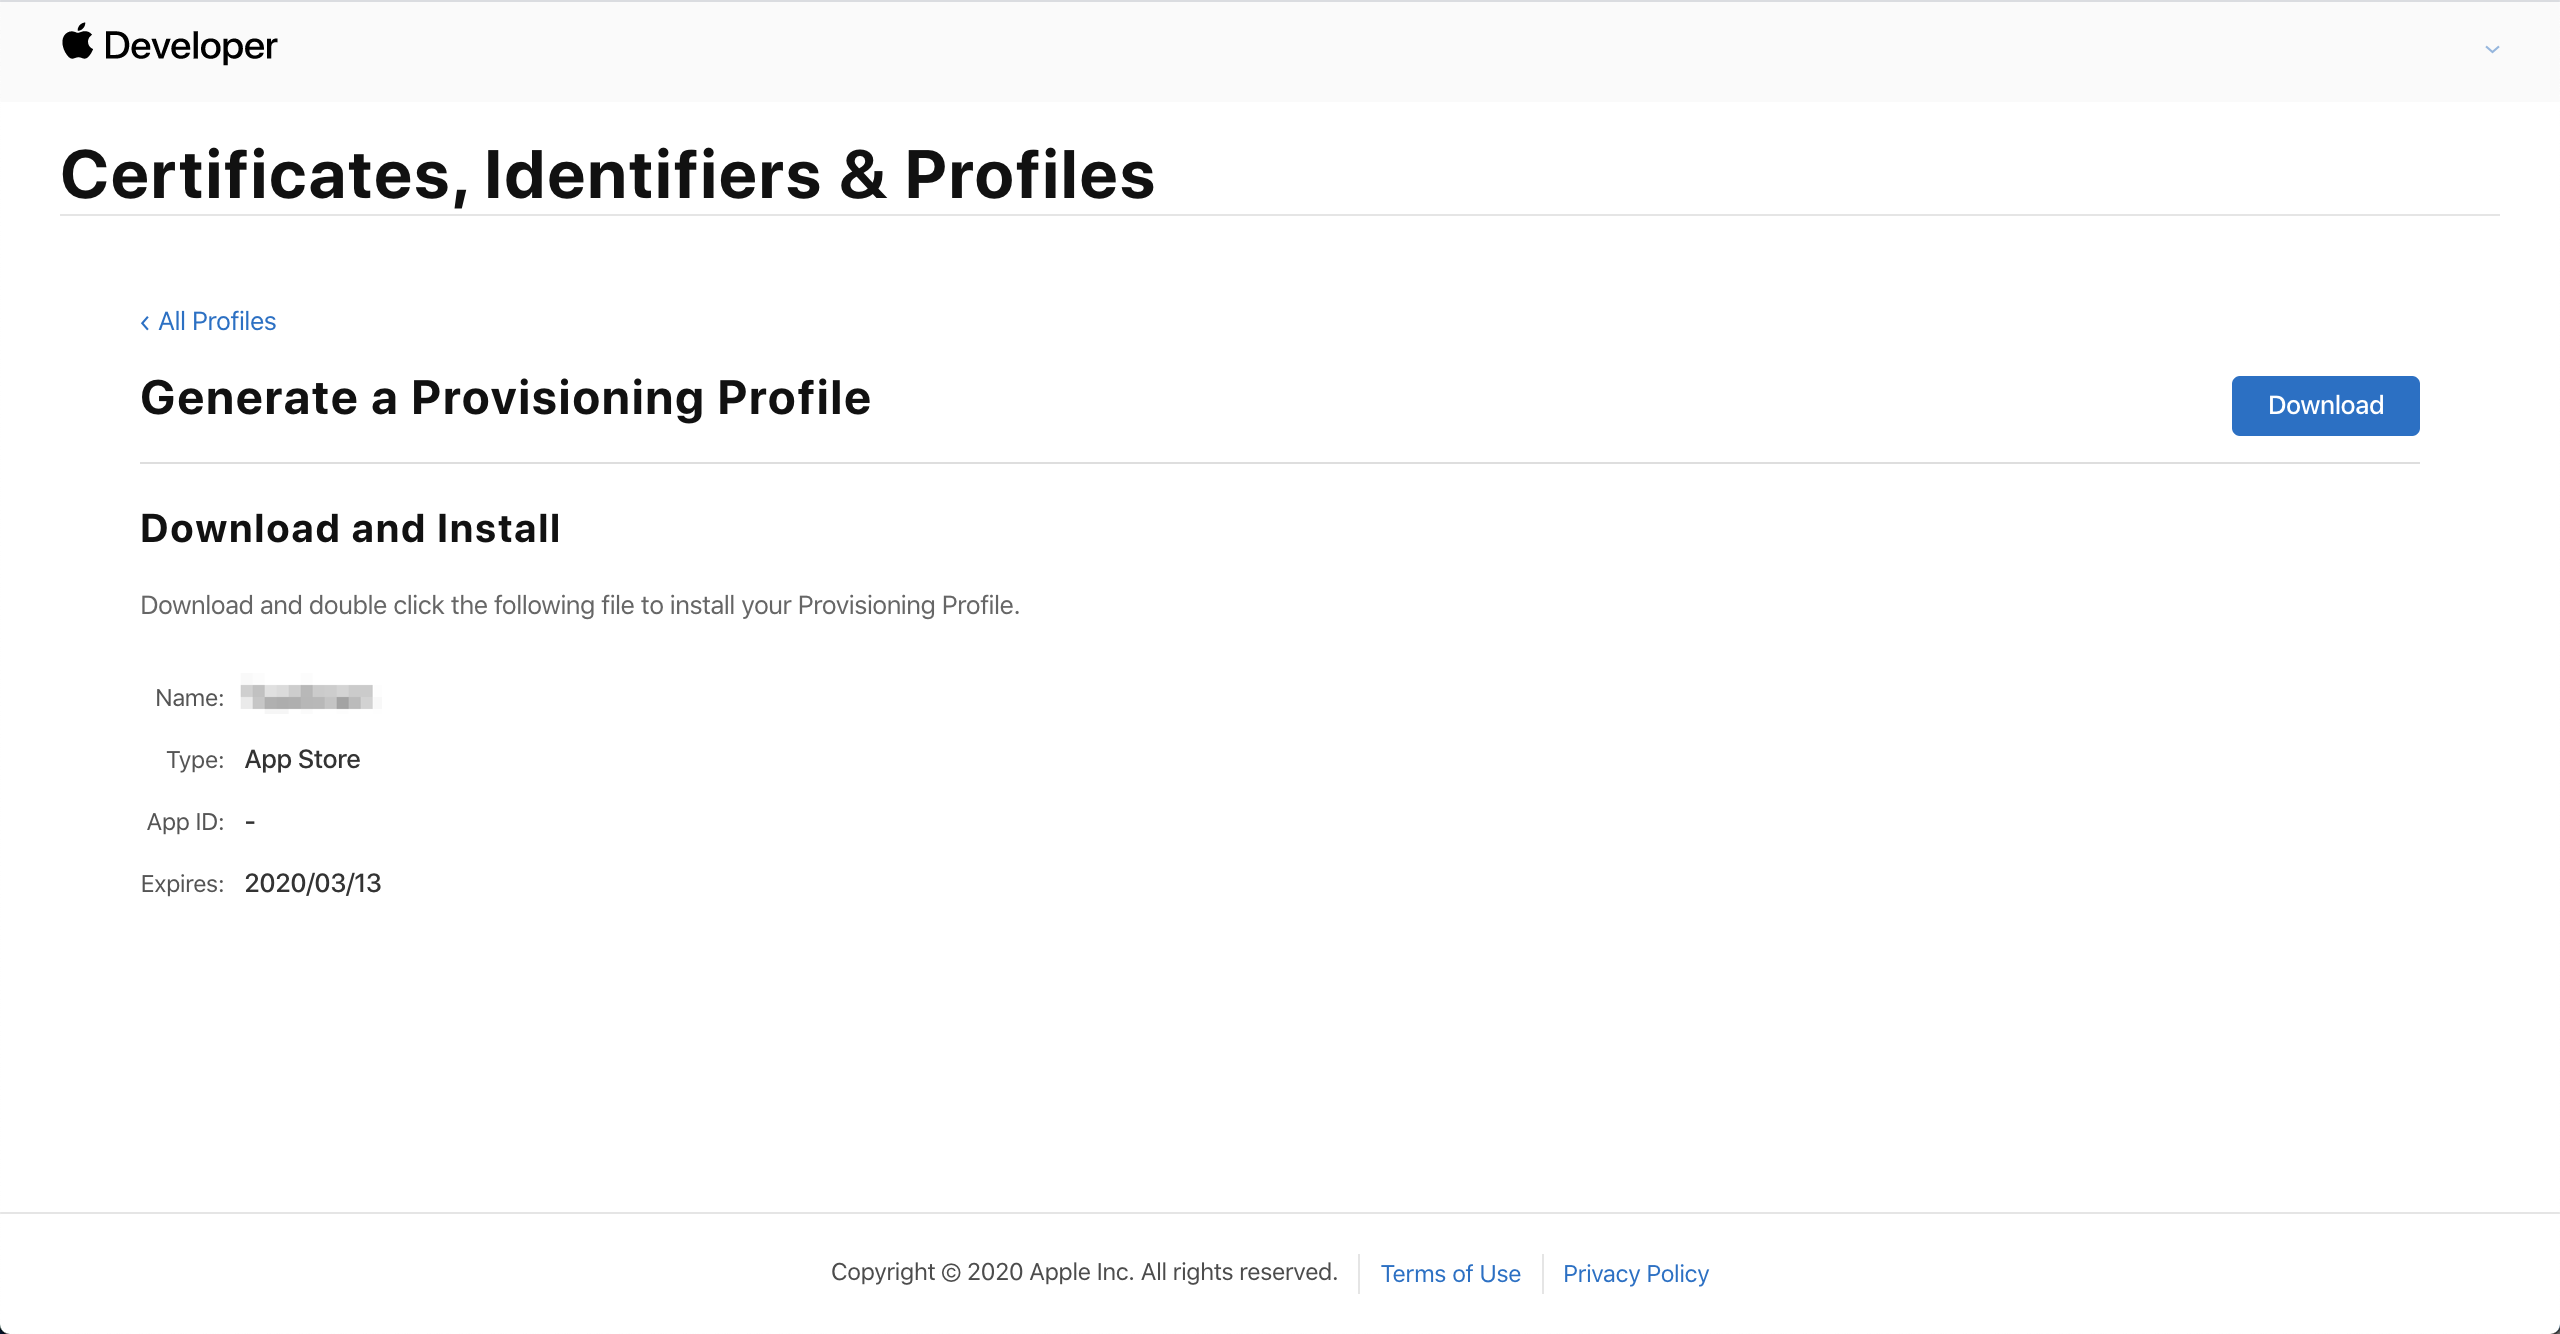
- Click "Download" to download the provisioning profile and complete the file creation.
Notes
- After uploading the application certificate, you need to rebuild the app for the changes to take effect.
- The push certificate is valid for 1 year. After it expires, app pushes will fail. To resolve this, you need to create and upload a new certificate, without the need to rebuild the app.