Appearance
Quick Access to Developer Center
1. Test Communication
Send "AT" to the module with QthTools-MCU Simulator to test whether the function of AT commands is normal. If QthTools-MCU Simulator prints "OK" as the return value, it indicates that your device has communicated with the PC successfully. The interaction example of QthTools-MCU Simulator is shown in the following figure.

2. Initialization
You need to initialize some configurations the first time you access Developer Center.
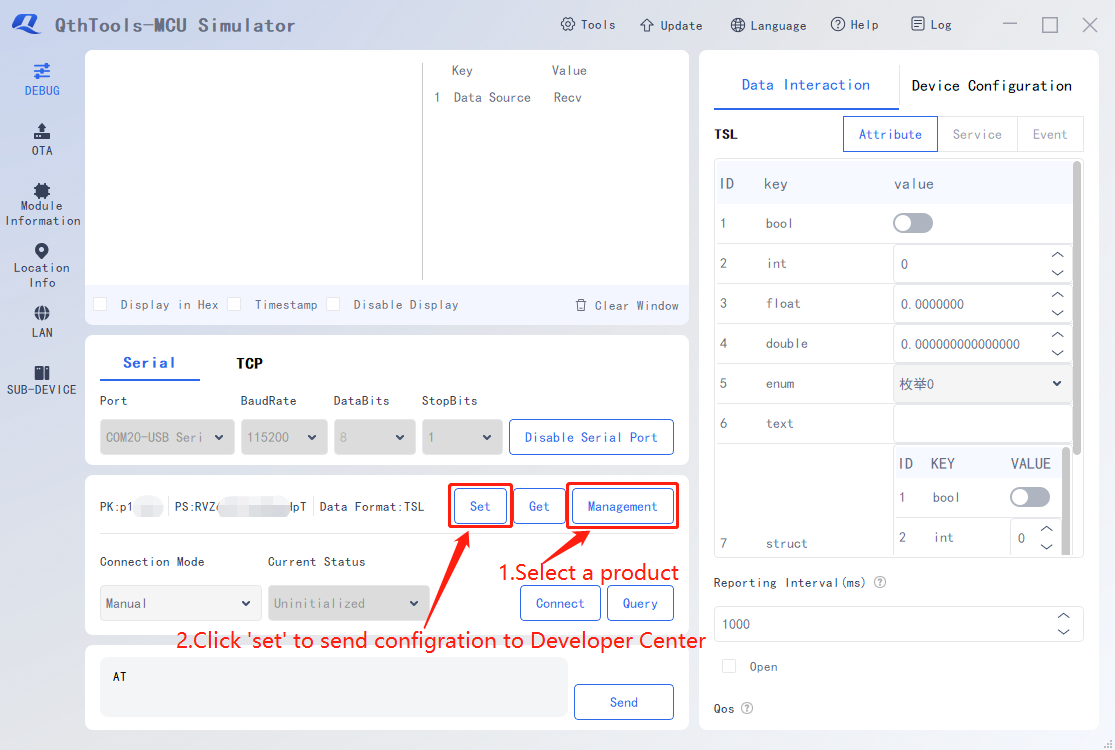
1) Configure PK and PS
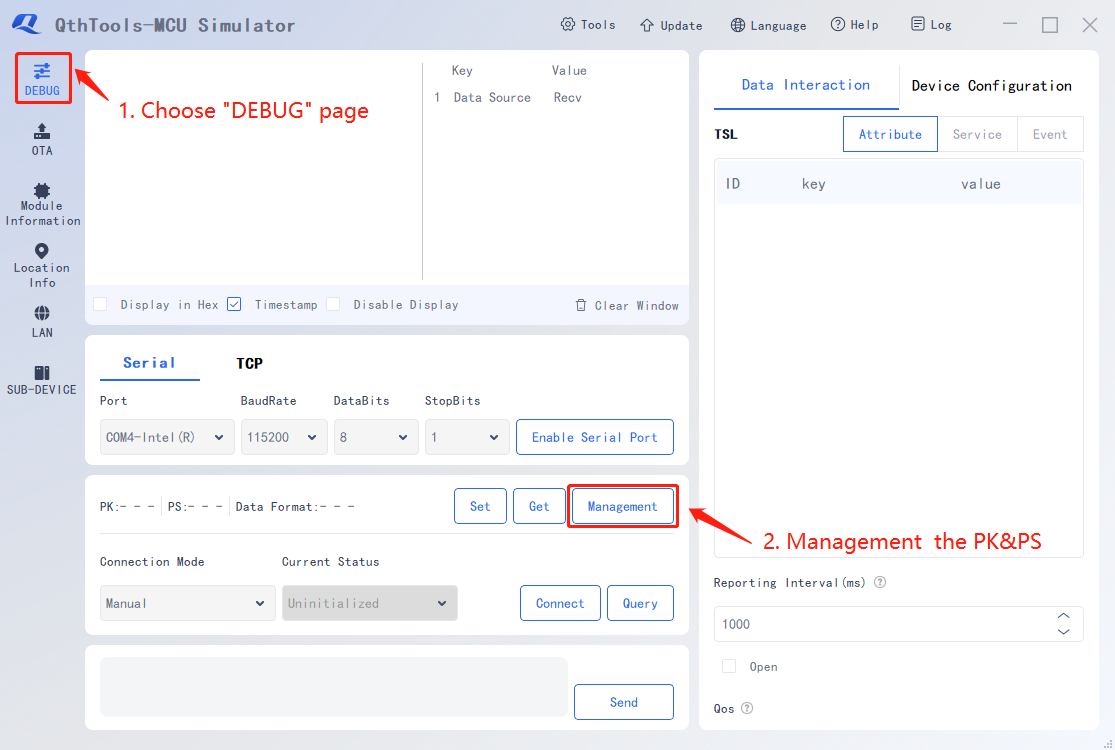
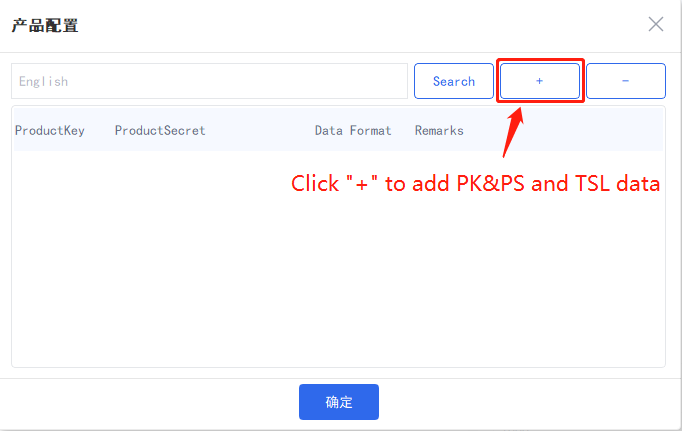
2) Add product information
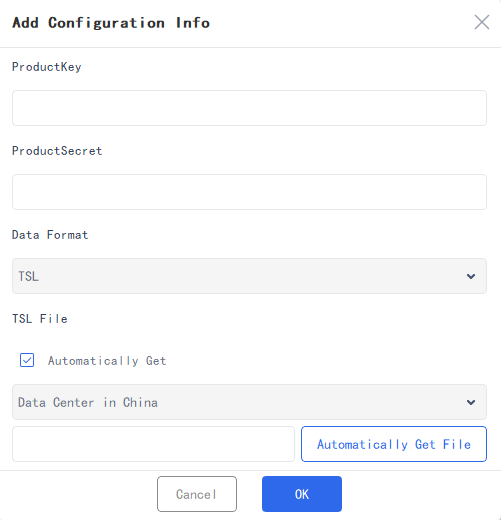
ProductKey: ProductKey is generated when a product is created.
ProductSecret: ProductSecret is generated when a product is created.
Data Format: TSL or Transparent transmission. Select the data format corresponding to the product.
Feature Definition File: You can select Automatically Get or Import Local File.
- Automatically Get: Depending on the Data Service Center of the product you created, click Automatically Get File .
- Import Local File: Enter Developer Center and click "Export" in the "Define Feature" page to export TSL file in JSON format to the local PC. Click "Import file" and select the TSL file exported in.
Note: This step is skipped if the data format is transparent transmission.
3) Send product configuration AT command
4) Configure Json format (optional)
 ① Select the "Device Configuration" tab.
② Select the “Json” format and click the Set button.
Unless otherwise specified, there is no need to modify other configurations.
3. Access Developer Center
1) Initiate connection
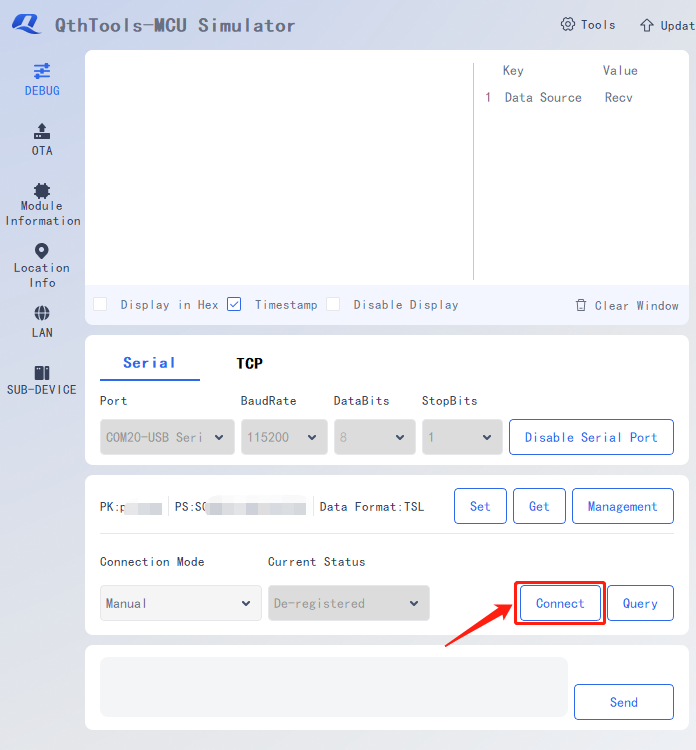
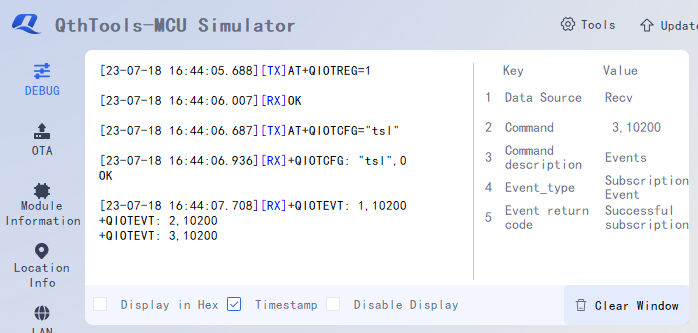
2) Response to a successful connection
When QthTools-MCU Simulator prints the return values in the following figure, it indicates that your device has successfully accessed Developer Center and can communicate with Developer Center.
Note: The network of Wi-Fi devices needs to be provisioned through the app.